Tankers!!!
This is my new project: A
Matilda II Mk II A12 with crane, for removal turrets of other Matildas. These Matildas Crane were used to replace the normal turrets by CDL turrets.
 |
| Two Matildas for different jobs... |
The real thing:
 |
| Matilda Mk II crane |
Profile:
 |
| Matilda II Crane from 49th RTR |
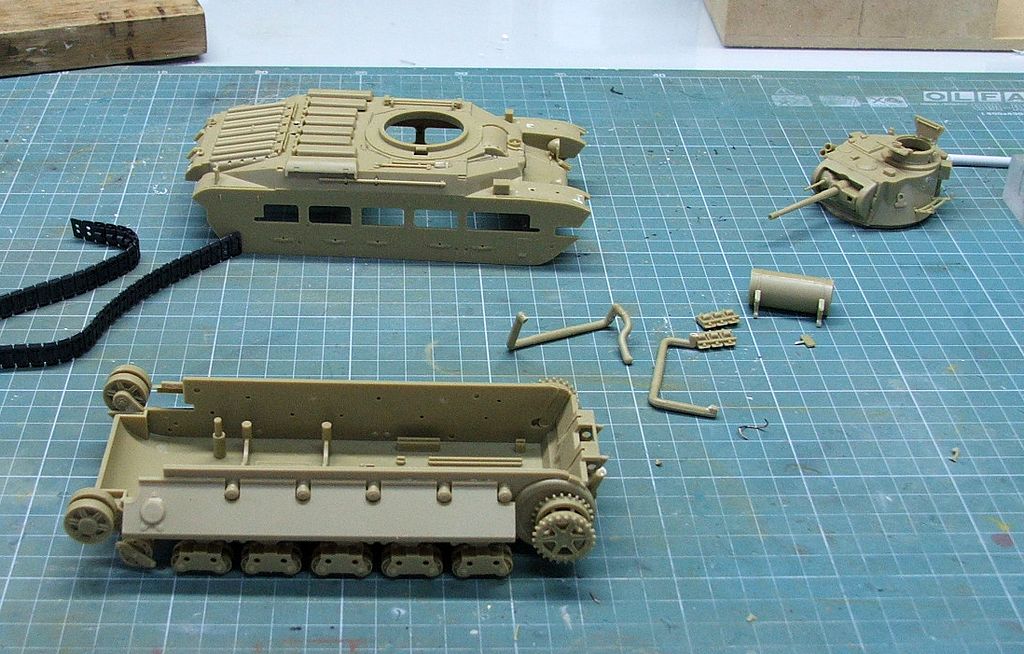
For these plastic adventures, I like to use old or scrap kits ...I have a semi-built kit, (old Tamiya) that will serve for this purpose perfectly ...
 |
| Tamiya (old) Matilda Mk II (scrap) |
 |
| ATL-72 Matilda tracks (early type) |
Starting by the blueprint. Our friend Alvise Scatto from Italy, asked for the scale drawing to scratch this project. The problem with scaling drawings is that printers change the size of the drawing, depending on the resolution of the printer and/or drawing software. To help, I have put some measures that, if you want, you can resize your printed drawing to these dimensions. These would be the measurements in the 1/35 scale, in millimeters. The drawing fits in a standard A4 paper sheet
 |
Measurements of the project, in 1/35 scale
Resize the outer red rectangle in the provided measurements
and print in your image editor.
|
 |
| The beast and the blueprint. |
The Friul tracks. Awesome...
As I was refurbishing the scrap kit to make the crane model, I decided to do an up-grade in the Verlinden turret from my Matilda CDL kit. The Verlinden turret has a flat roof (wrong). The correct is tilted.
 |
The right CDL turret (left0
and Verlinden one (wrong- right) |
 |
| The new turret with old good parts: |
After heart palpitations caused by the update in my Matilda CDL, let's return to the scratch and the crane...Plastruct time!!!
 |
| Support crane built with Plastruct |
 |
The sides of the fenders were armored and were part of the Matilda´s structure.
Therefore, it could bear the weight of the crane and his load...
|
Using the blueprint (in perfect 1/35 scale) to scratch the crane...Plasticard 1,5mm thick.
 |
| Using the blueprint as templante to cut the plasticard |
Almost done:
 |
| plastic and metal... |
The arms of crane was made by Plastruct. Dry-run:
 |
| Notice the Matilda CDL in background |
Building the anchoring in the rear hull:
 |
| Notice the rear anchorage devices |
Upgrading the old Tamiya kit:
 |
| Notice the armoured doors hinges |
Racks of crane´s frame:
The arms of the crane was installed with stabilizer wires (dry-run) to show the position of the angle of the arm. The support of the turret (lifting frame) and its hooks being tested ...
 |
| The crane under tests... |
The lifting frame:
Upgrading the turret: Replacement the plastic gun by metal (RBModels). Sometihing wrong with this turret...The MG coaxial is very long...
 |
| The coaxial machine gun is too long... |
Definitive rigging cables installed ... The kit is ready for primer:
Build the hoist of the crane: The lead weights are to keep the rigging stretched.
Primer:
The Matilda was painted in bronze-green. And so, I discovered what was wrong with the turret with gun (and had already painted). The mantlet was built inverted, with the coaxial in the sight hole. Uff...What a shame!!!
 |
Mantlet corrected (in green and other turret, for the crane).
In the pic insert, the wrong mantlet |
I managed to disassemble the mantlet by inside of the turret, without damaging the paint and articulation of the gun. Everything is back to normal ... whew!!
The turret fixed and installed in the Crane tank:
 |
| Turret with fixed mantlet |
The whole group, as will become
However, when the artillery turret is removed from the hull, is accompanied by the "basket" that "contains" the crew of the turret. And the Tamiya kit does not come with this interior detail.
 |
| Tamiya´s turret without crew basket |
Scratch time:
 |
| The basket in scratch... |
The "accessory" tower painted:
The CDL tank turrets:
 |
| Cdl and gun turrets to CDL tank |
The crane, in close-up:
After the paint, decals...Markings of 49th RTR - 35Th Tank Brigade
 |
| Matilda Mk II - Crane tank - "Gerald" - 49th RTR - 35Th Tank Brigade |
Leveraging who was reforming the Matilda CDL, I decided to change the tracks that were in the model by the early model, from Bronco: The survivor Matilda CDL, in Bovington, has this kind of "shoe".
 |
| Notice the early and late Matilda tracks. The kit was wrong... |
Voiláá!!
 |
| New (early) tracks installed...Much better !!! |
The all project is almost ready...:
Well, the final pics:
 |
| Matilda crane removing the CDL turret from Matilda CDL tank ... |
 |
| Matilda Crane transporting the gun turret to depot. |
Bye for now, Gents !!!