
Ferrea mole, ferreo cuore...
"Iron mole, iron heart"... the famous motto of the italian tankers
Amici Italiani!!! Today we're going to talk about one of the largest armored vehicles ever designed and actually built. The vehicle in this article is the huge Carro Armato Fiat 2000, a forty-ton monster, which was built at the end of the First World War. A pioneer, a giant, a predecessor of our modern main battle tanks. Avanti!!
 |
| Carro Armato Fiat 2000 - fully functional replica. April - 2020 |
 |
| Carro Armato Fiat 2000 Prototype no.2 - 1918 |
History:
The Fiat 2000 was an Italian heavy tank designed in 1916 by engineers Giulio Cesare Cappa and Carlo Cavalli and built in only two examples between 1917 and 1918 and never entered in serial production. It was one of the largest designs of its time. During World War I, Italy did not field any armoured units, due to a lack of tanks. The only solution at the time was to begin production of original designs.

The order to design and produce the first Italian tanks was accepted by the FIAT automobile company in 1916. The prototype of the new tank was displayed to a military commission on 21 June 1917; its mechanical systems were complete but its superstructure was added later, being represented on the prototype by a wooden mockup with a conical open turret and dummy gun.
 |
| Testing the chassis, suspension and drive train of the first version of the Fiat 2000 prototype mid 1917 |
The final configuration of the superstructure was not completed until 1918, when it was subjected to intense field tests, for evaluation by the military.
 |
| First version of the Fiat 2000 prototype seen going down a hill, during trials late 1917. |
 |
| First version of the Fiat 2000 prototype, under maintenance, during trials late 1917. |
 |
| No field test is complete without at least a few poor trees being ripped to shreds... Here we see the first version of the Fiat 2000 prototype tank using its strength and weight to do just that... |
See below this excerpt from an IWM newsreel about field testing of the first version of the Fiat 2000 prototype:
Description:
The Fiat 2000 was a substantial vehicle, of comparable dimensions to the British Mark V tanks, and weighing 40 tons as compared to the Mark V's 28 tons.
 |
| British Mark V Male tank cutaway |
The driver was seated at the front, with very good overall vision consisting of a large port forward and small lateral loopholes. The gunners were distributed by the hull and turrets of the vehicle, handling their weapons.
 |
| Fiat 2000 - crew stations Notice the in the mechanical lay-out of the vehicle. |
 |
| Fiat 2000 nº1 - 3/4 front right view Italy, 1918 |
 |
| Fiat 2000 nº2 - 3/4 front left view |
 | |
|
The layout of the Fiat 2000 differed to the other tanks then in use, especially the British ones. The engine was separated from the crew; not placed behind the crew compartment as modern tanks, but below it. This was extremely innovative for the time, which generated greater safety for the crew (away from the main fuel lines and exhaust gases), in addition to the comfort generated by thermal and acoustic insulation allowing better performance by tankers in their work.
 |
| The crew compartment was separated from the mechanical components (hatched red line) |
The mechanical layout was also interesting and innovative, comprising a huge FIAT Aviazione A12, water-cooled engine (21.200 cm³ , with 6 cylinders in line, generating 250 hp @ 1.400rpm) driving the tracks through a transverse transmission, and final transmission by chain. The fuel capacity was 600 liters, but this gave only 75 km range on paved roads.
 |
| FIAT A.12 engine Research & Development Gallery National Museum of the United States Air Force |
The tracks were longer than the hull, but were lower in comparison to the wrap-around type found on the British rhomboidal tanks and thus lower in weight. The armour was of clean design, being made of riveted steel plates. It was 15 mm thick on the sides and 20 mm on the front.
Armament originally consisted of the turret mounted gun and ten machine guns (three on each side and four in front - see the pics of the first version of the prototype, at the beginning of this article), but this left the rear of the tank undefended and tended to contaminate the interior with propellant fumes. So it was decided to install a ventilator in the rear roof and alter the machine gun positions to two on each side, one of the midle of the rear and four in the corners of the hull, in the definitive version of the tank.

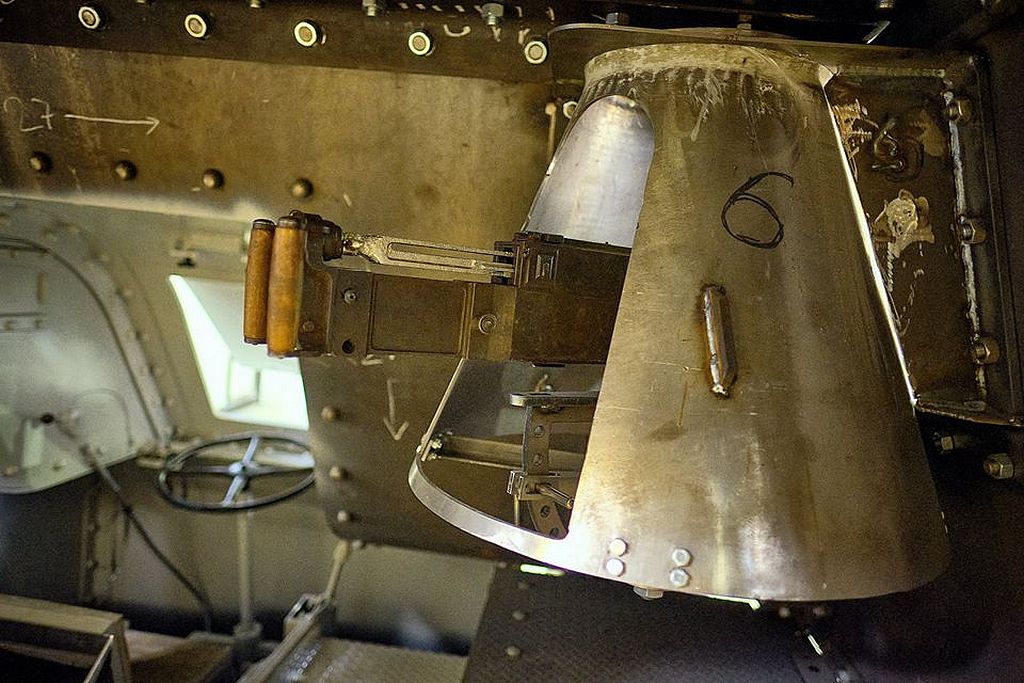
Perhaps the most interesting feature of the tank's weaponry was the turret. apart from the Renault FT, this was the first tank to have a rotating turret mounted above the hull. The turret was made of four curved pieces rivetted together and had room enough for two crew members. Its weapon was a 65/17 howitzer (of 65mm caliber with a barrel 17 calibers long). Thanks to the tall turret and the space available beneath it, the gun's elevation was -10/+75°.
 |
| Cannone 65/17 modello 13 mountain howitzer firing at Austrian positions on the Sass di Mezdi - Monte Padon World War I - Italian Army |
The 6.5 mm Fiat-Revelli machine guns Mod. 1914 (seven in total) had 50º drift to each side, giving a total firing angle of 100º. Elevation was 20º and depression was -5º.
 |
| 6.5 mm Fiat-Revelli water-cooled machine gun Mod. 1914 |
Operation:
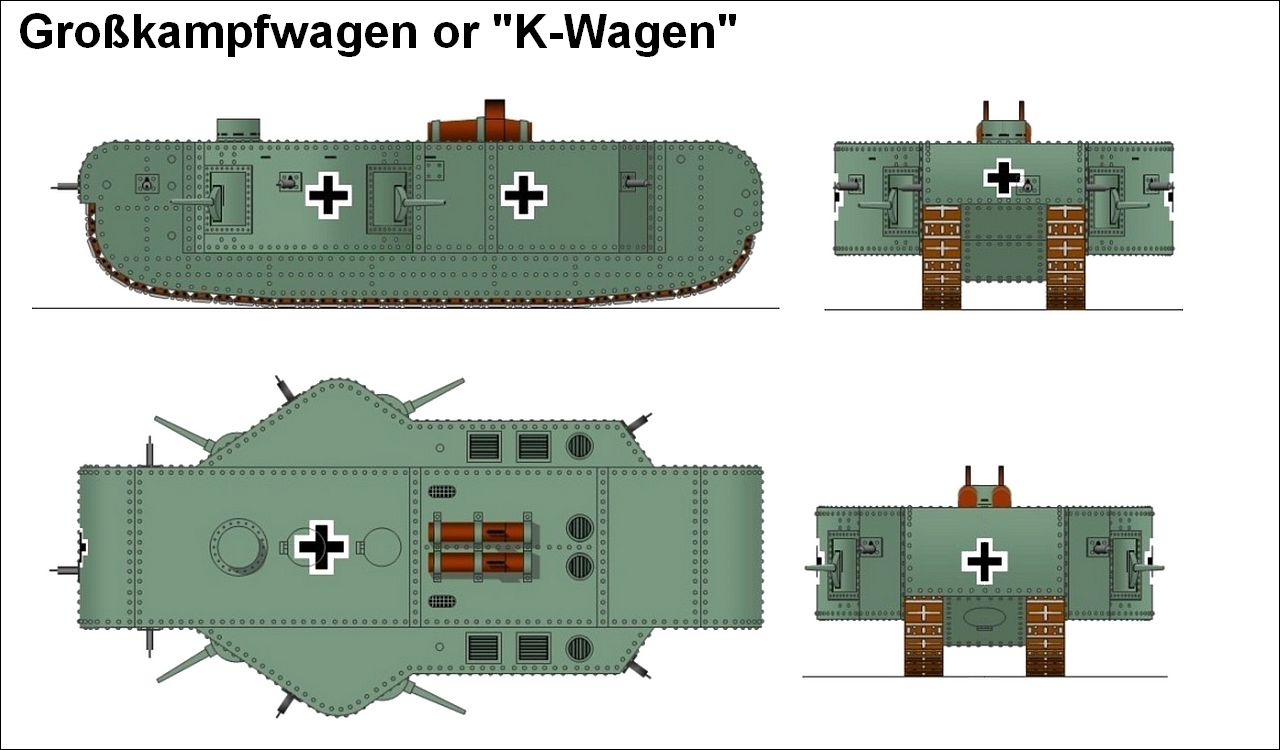
This tank was often called "the heaviest World War I tank" but this is not strictly accurate, since the Fiat 2000 never actually saw combat in World War I. Also, the modest order for 50 tanks was never completed, the only tanks produced being two prototypes. But at difference of the K-Wagen, was built and so is the heaviest tank of World War I era.
 |
| Comparison of dimensions between tanks... Indeed, the Fiat 2000 was very big Fort Tiburtino - Italy - 1927. |
 |
| One of the two Fiat 2000 prototypes undergoing final tests, before being incorporated into the Regio Esercito. Notice that the machine guns are not installed... Italy - early 1918 |
After the war, the Fiat 2000 was presented as one of the weapons used 'to defeat the enemy' and of the two completed prototypes, the number 1 was sent to Tripolitania, Libya to fight the guerrilla forces, together with other tanks bought from France, in a special unit, the 1st Autonomous Assault Tank Battery. (1° Batteria autonoma carri d'assalto).
 |
| Fiat 2000 nº 1, just arrived in Libya - 1918 |
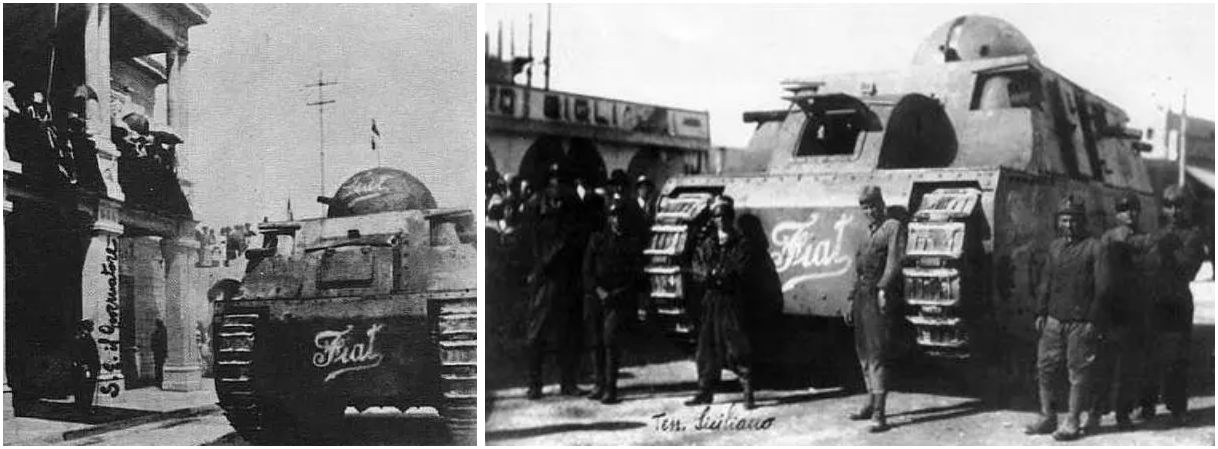 |
| Fiat 2000 nº 1 - 1° Batteria Autonoma Carri d'Assalto Tripoli, Libya - 1918 |
In Libya, the Fiat nº1 tank proved to be slow and clumsy, being practically useless to follow the fluidity of the type of combat it was exposed to, most of the fights were rapid movements (guerrilla tactics) of the Arab rebels in the Misrata area. Its operational employment was very short, and after a few months of use, it was abandoned on the African sands.
Despite the efforts, only those two Fiat 2000s were completed and production was permanently halted on November 4, 1918. It is known that at least one of the two tanks, prototype number 2, was taken to the Piave River in the spring of 1918 however there are no records of its wartime use
The Fiat 2000 nº2 returned to Italy and remained stored until the spring of 1919, where it performed before the King Victor Emmanuel III di Savoia at Stadio Nazionale del PNF (National Stadium of the National Fascist Party), in Rome, in 02 April, 1919.
 |
| Fiat 2000 No. 2 performing for the crowd in Rome Stadio Nazionale del PNF - 02 April 1919 |
 |
| The Fiat 2000 nº 2 knocking down an inner wall in the stadium Stadio Nazionale del PNF (later Flaminio Stadium) - Rome - 02 April 1919. |
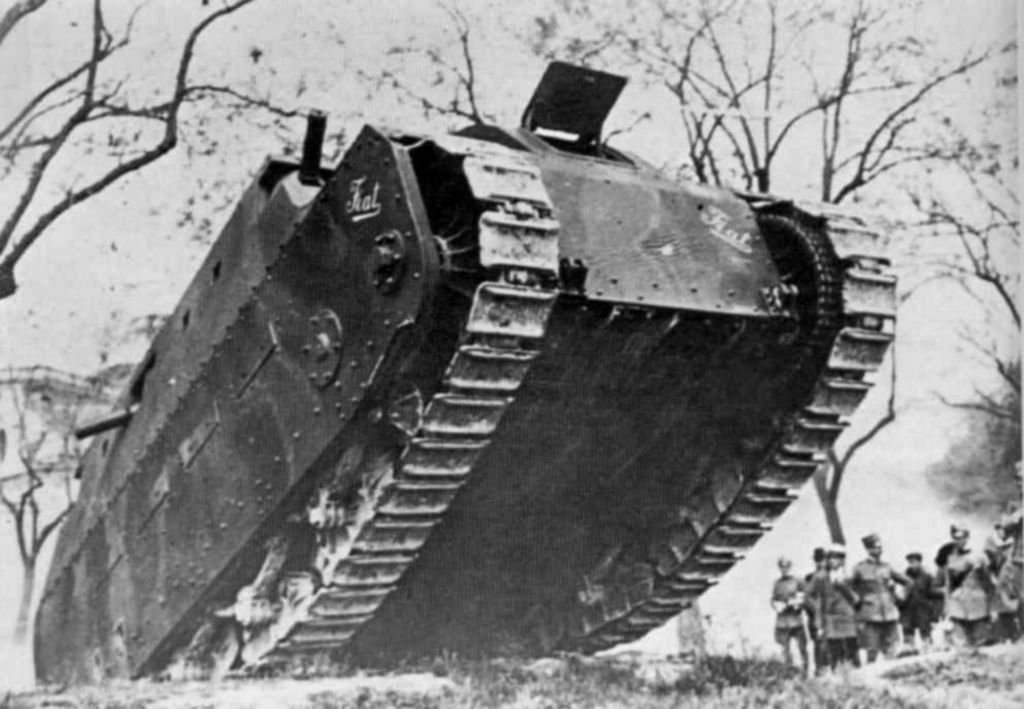
The tank put on a convincing display: it climbed a 1.1 m wall, then faced another 3.5 m wall, which it knocked down with its weight. Then a trench of 3 m width was successfully crossed and several trees were knocked down.
 |
| The Fiat 2000 nº 2 crossing a specially constructed trench inside the Stadio Nazionale del PNF - Rome - 02 April 1919. |
 |
| Another dramatic angle shot of the Fiat 2000 nº 2 overcoming an obstacle, at the Rome show - 02 April 1919 |
 |
| The Fiat 2000 nº 2 knocking climbing a wall in the stadium Stadio Nazionale del PNF - Rome - 02 April 1919. |
 |
| Again, the Fiat 2000 nº2 in performance ... Stadio Nazionale del PNF - Rome - 02 April 1919. |
 |
| The unstoppable Fiat 2000 in its performance for the King... The crowd goes wild!!! |
 |
| After the show, the Fiat 2000 nº 2 with his full crew in front of him. One officer (commander) and seven soldiers. Stadio Nazionale del PNF - Rome - 02 April 1919. |
 |
| After the show, the Fiat 2000 nº 2 with hiscrew in front of him. rear view Stadio Nazionale del PNF - Rome - 02 April 1919. |
But this impressive performance failed to revive interest in the Military and due to its poor operating performance in Libya and the high cost of being manufactured, the plans for series production were abandoned, with the two vehicles built again being stocked.
The FIAT 2000 nº 2 at Rome was left in a depot for several years, until it was sent on the orders of Colonel Maltese to Forte Tiburtina, where it caught fire during transport, being restored. In 1934 it was seen again in a Campo Dux parade, having been repainted and even rearmed, with two 37 mm Vickers-Terni L/40 (37/40) semi-automatic guns, built at the Terni plant in Italy (the same used by Carro Armato M11/39) instead of the front corners machine guns.
 |
| 37 mm Vickers-Terni L/40 (37/40) semi-automatic gun |
 |
| Blueprint of Carro Armato Fiat 2000 - 1934 upgrade two 37 mm Vickers-Terni L/40 semi-automatic guns in the front angles stations of the tank. |
 |
| An attractive vehicle for the public and for state propaganda: Fiat 2000 nº 2 updated with two 37/40 guns, flanked by two Fiats 3000/21 in an Opera Nazionale Balilla event. Campo Dux - Rome - 1934 |
 |
Two members of the Opera Nazionale Balilla - ONB, (an association of the Italian Fascist Party similar to the Hitlerjugend) pose proudly in front of Fiat 2000 nº 2. Notice this tank had its front 6.5mm machine guns removed, but the two 37mm guns have not yet been installed, the same happening with the turret howitzer |
%20M.34%20-%2037mm%20front.jpg) |
| Again, Balilla boys with Fiat 2000 nº 2... Typical photo of the Fascist Party Propaganda, for the volatile and enthusiastic masses. Notice that the tank now features the two 37mm guns installed, as well as the new howitzer in the turret (partially hidden by the boys) Rome - 1934. |
After these demonstrations, the tank was again stored and after which stood as a monument in the Corrado Mazzoni barracks in Bologna, headquarters of the 3rd Tank Infantry Regiment, but then this too disappeared around 1943, during the WWII, to obtain precious metal.
With that, the story of the first Italian tank ended, but the Armored Gods had other ideas in mind...
In 2017, a group of members of the Associazione Nazionale Carristi d’Italia (ANCI) and restorers of vintage military vehicles from Fabio Temeroli's "Raggruppamento Spa" and the "Cultori della Storia delle Forze Arme" Association read an article on the centenary of the construction of the Fiat 2000, the first tank built in Italy.
The idea of rebuilding this tank, which was lost in time, settles and grows, almost automatically. The search for drawings and blueprints begins immediately. The descendant of Count Bennicelli, father of Italian motorsport, is traced, research is carried out in the archives of Fiat and Ansaldo firms but almost nothing is found. Research is also carried out in Università di Pisa and in Centro Ricerche Casaccia - ENEA in Rome. But the only thing available is a longitudinal section and several period photographs. With that in hand, designer Mario Italiani, former M-47 tank driver and now president of ANCI from Zeccone, begins to virtually redesign the chassis with a 3D modeling program.
After an exciting "mechano-archaeological" adventure, the 1.5 m long wooden "mock-up" from 1917 was found. This priceless find revealed precise details such as the riveting of the plates, the links of the tracks and constructive details of the large spoked wheels. After more than 1500 hours of work (free of charge), the 3D project was ready. According to Mario Italiani, the exterior of the vehicle reproduces 100% of the original while the interior and mechanical functions, the vehicle-replica is around 85%.
| 3d drawings for the replica |
 |
| 3d drawings for the replica |
But now, things got complicated: where to raise funds? A special commission was created to raise funds, under the aegis of the National President of the ANCI who, after having beaten many large Companies, initiates subscriptions - sponsored mainly by the ANCI section from Florence - aimed at all former tank crews and enthusiasts.
A crowdfunding raised 35,000 euros, but it was still not enough. The industrialist Giancarlo Marin, owner of Svecom PE S.r.l., and founder of the Museo Civico delle Forze Armate 1914-45 (Montecchio Maggiore - Vicenza - Italy) receives 10,000 visitors a year free of charge, took care of advancing the expenses and solving the most emergent situation.
The construction of the Fiat-replica started on 15 November 2018.
 |
| Start of construction: chassis and support arms for suspension bogies |
 |
| Structural reinforcements of the chassis ventral armor |
 |
| Working on the bow of the vehicle. The driver's station taking shape... |
 |
| Fiat 2000 replica - front view Notice the driver´s hatch and front glacis |
 |
| View of the interior portion of the vehicle. The bus-type Fiat gearbox being installed just behind the driver's station. |
 |
| Fiat 2000 under construction Side hull and suspension details right view |
 |
| Suspension bogies recreated down to the last detail, following the original blueprints. |
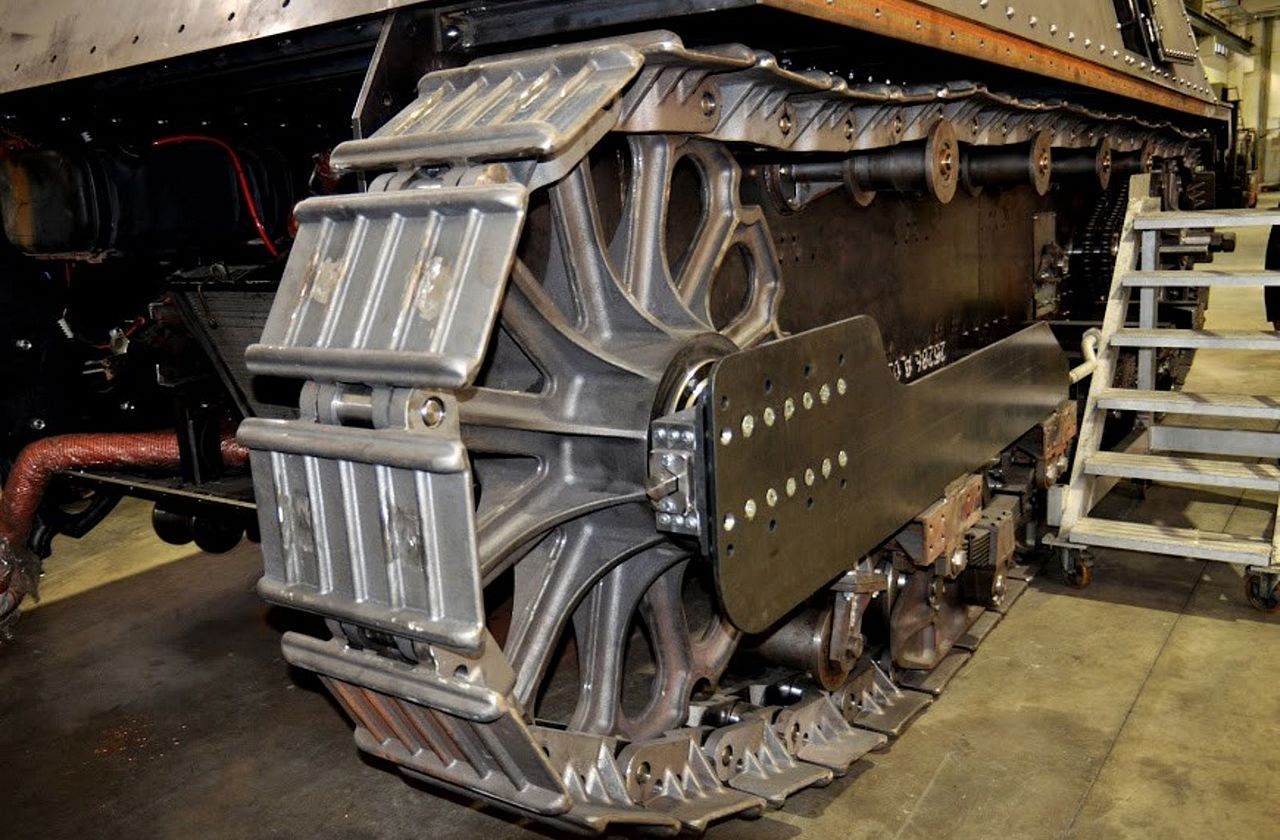 |
| Tracks, links and wheels...perfect!!! |
 |
| The big rounded turret, with gun being able to shoot in 360º of drift. A pioneer in its time... |
The builders opting to use an "old school" (1952) autobus type diesel engine, the Fiat Verticale 203/03 - 6-cylinder, with 10.676 cc and 140hp @ 900 rpm.
 |
| Fiat parts catalog cover on the 203 diesel engine from 1956. |
They thought of using a contemporary engine from the 1916s, but spare parts would have been a huge problem. With this intermediate option, they had at least something very close to the original, with more reliability, since the tank would have to be mechanically operational. The weapons are non-operational replicas, and the machine guns are perfect copies of the originals.
 |
Seven non-operatives replicas of |
 |
| The front right corner combat station, with armored rotor and machine gun in position, under construction. Notice the driver's station in the background. |
 |
| The same station view above, after completing the tank. Notice the details of the reconstruction... |
 |
| Internal view of the tank, after finishing. Rear-to-front viewing angle, with the driver's station in the center. Notice the amazing details... |
 |
| Internal view of the tank, after finishing. Front-to-rear viewing angle, from left to right: aft central machine gun station, aft rear corner station and right side station. |
 |
| Internal view of the tank, after finishing. Front-to-rear viewing angle, from left to right: left side station, aft left corner station and aft central machine gun station. |
 |
| The turret finished. The Cannone da 65/17 modello 13 in position. Externally, a perfect reproduction... |
 |
| Turret. Internal view. Internally, the reproduction of the main weapon was not faithful. |
 |
| The Fiat 2000 replica, without the right side armoured skirt, showing suspension details and tracks... A strange thing is that this replica features access doors on both sides of the vehicle and not just on the left side, as in the original tanks. |
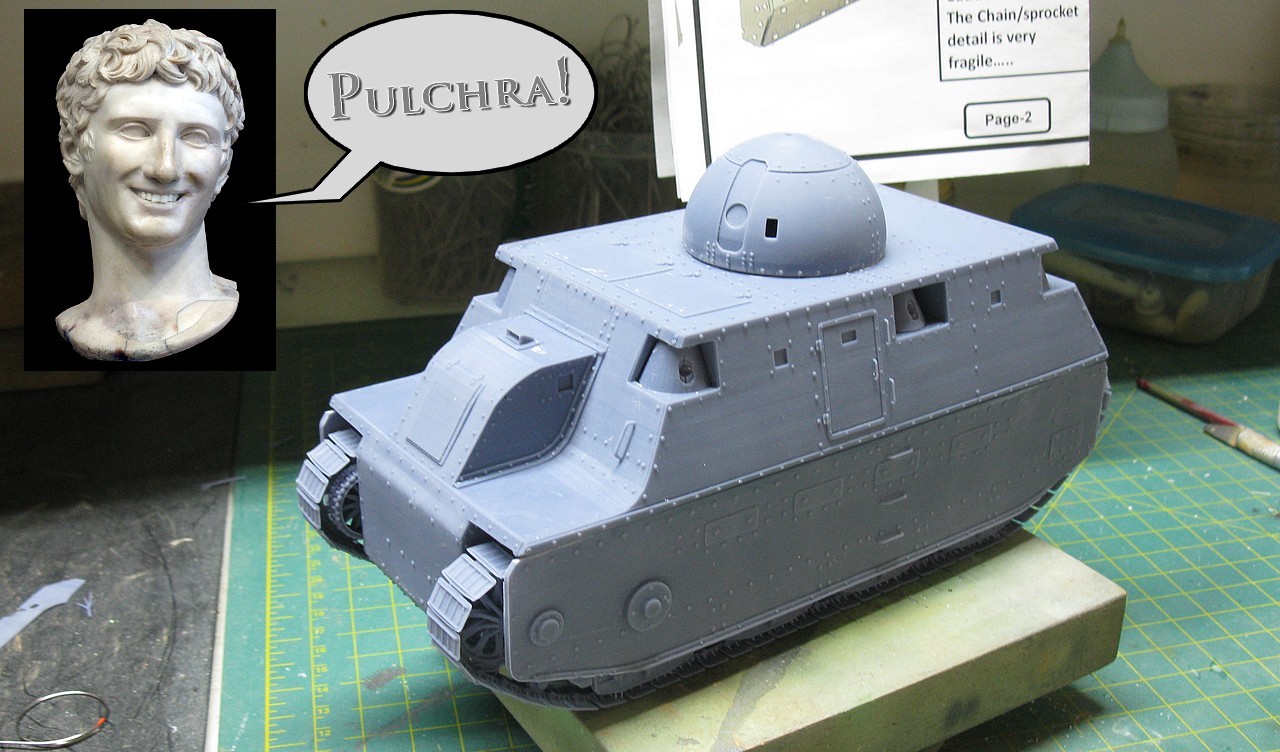
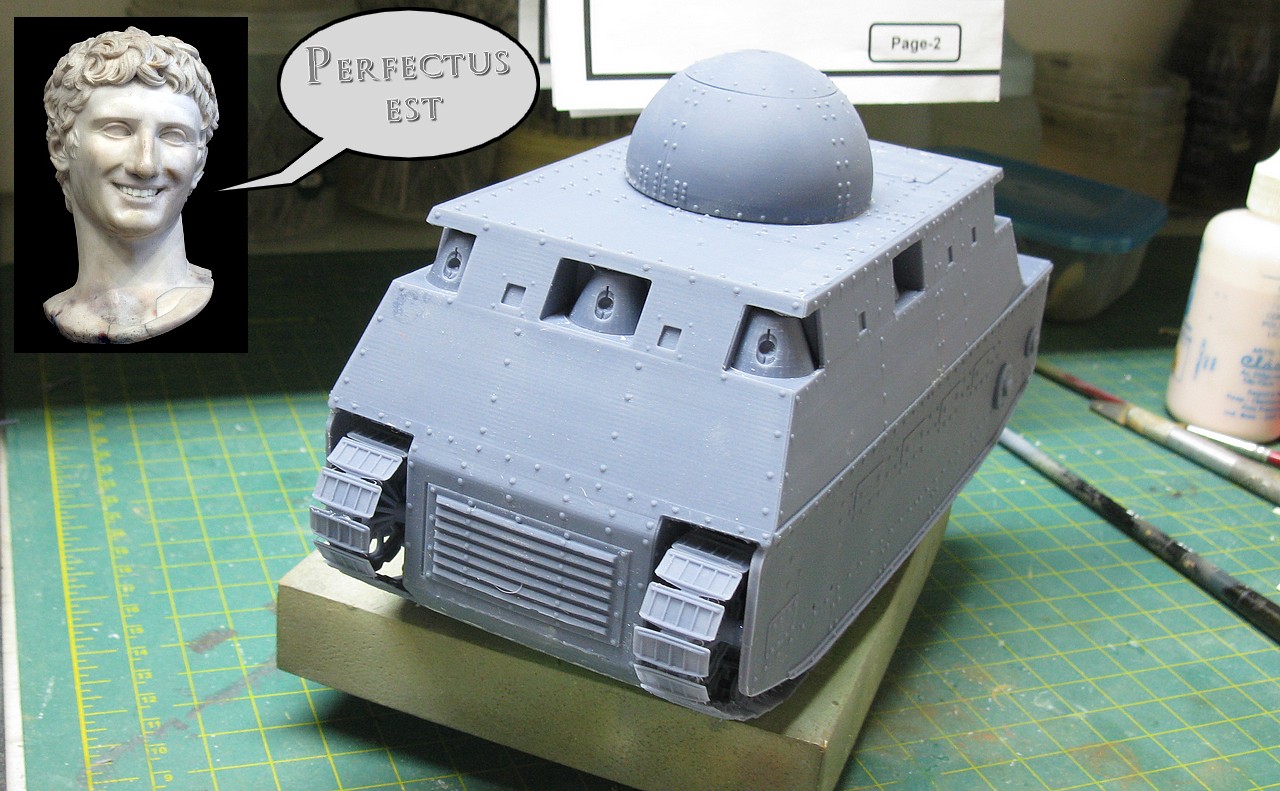
| The Fiat 2000 - 2022 being transported to its new home!!! Una ragazza bellissima e meravigliosa!!! |
 |
| Carro Armato Fiat 2000 - fully functional replica April - 2020 |
The Fiat 2000 reconstruction project was painted with the two-color camouflage and similar markings of its presentation in Rome in 1919, running on its own and declared ready from April 2020, and can be seen at Museo Civico delle Forze Armate 1914-45 , in Montecchio Maggiore , Vicenza - Italy.
Congratulations, Italy!! An example of respect for history that other countries could follow...

| Fiat 2000 - heavy tank | |
|---|---|
| Type | Heavy tank |
| Place of origin User | Italy Regio Esercito |
| Service history | |
| Wars Setting date Test date In Service | Pacification of Libya 1916 1917 1918 -1934 |
| Production history | |
| No. built Designer | 2 Fiat S.p.a. |
| Specifications | |
| Mass | 38.780 Kg |
| Length | 7.4 m |
| Width | 3.1 m |
| Height | 3.9 m |
| Crew | 8 |
| Armor | Front/sides 20 mm Top/rear 15 mm |
Main armament | 1 x Cannone da 65/17 modello 13 |
Secondary armament | 7 x 6.5 mm Fiat-Revelli Mod. 1914 machine guns |
| Engine | Fiat Aviazione A.12 water-cooled inline six cyl. (petrol) - 21.200 cm³ 250 hp @ 1.400rpm |
| Power/weight | 6 hp/t (4.5 kW/t) |
| Transmission | 6 forward and 2 reverse ratios gearbox, low range |
| Suspension | Leaf springs - balestre |
| Ground clearance | 0.4 m |
| Fuel capacity | 600 liters |
Operational range | 75 km |
| Maximum speed | 7,5 km/h |
The kit:
This is another commission project, with my client purchasing the 3D printed Vargas Scale Models Fiat 2000 Italian Heavy Tank M.1918 or M.34 (#R3D-35-071) kit for this order. I really like this Manufacturer, because Luis Vargas really invests in the release of historically important vehicles, following the company's motto: "Bringing History to Life".
 |
| Kojak with the Vargas Scale Models kit box, in my workbench... Another day, another challenge... |
Vargas kits are very well printed, with an improvement that is noticed with each new release, but when I opened this box, I found pieces that were fractured and warped, perhaps during the packaging and/or transport phase. A pity, because the printing details are very, very beautiful and this, without a doubt, will delay the progress of the construction...
 |
| Kit contents: very well printed pieces, but with packaging protection problems: parts with fractures and warping... |
 |
| The suspension and track sets are delicate and very well detailed...but... these fractures were really not foreseen in the planning... |
 |
| Rebuilding this is going to be tricky... Let's see what we get... |
 |
| The details are fantastic, but the warping of the pieces also compromises the quality. Maybe the packaging was done before the pieces "cooled down" properly.... I don't know.... My 2 cents! |
 |
| From this angle, you can see the size of the challenge that awaits me.... Such delicate pieces do not withstand heat to facilitate straightening... |
And to complicate things a little more,I think I won the lottery on the contrary, with this kit: The tank hull came with parts where the printed resin was melting into oil, forming blisters and deformities. Thanks to the Immortal Gods, these parts are not evident in the vision, but that will have to be worked on and rectified for a correct construction.
 |
| Note the material "laminating" on the lower portions of the sponsons and the blisters and deformities on the ventral armour. Notice the different color of the material, in the ventral portion, where the problems are concentrated... |
 |
| The deformity in the ventral armor, with "lamination" on one of the edges (red arrows) and "lamination" on the lower portions of the sponsons in the other side (blue arrows)... |
Didn't I say I'm a lucky guy? Continuing the examination of my kit, I discovered a "dip" in the roof of the driver's station, exactly where the periscope is located...
 |
| Notice the "curve" in the driver´s roof... |
 |
| And along with the "sag", some cracks in the rear portion on the limit between the periscope and the roof (red arrows)... Am I or am I not a lucky guy??? |
 |
| Another angle of the same problem... |
Since I'm going to replace the ENTIRE tank floor with a plasticard, I'm going to access it to visualize and try to understand the reason for the problem with the roof of the driver's station. Opening a window to access the interior of the tank, for a ventral view of its interior... Using (carefully...) a sharp steel disk on my priceless and dear Dremel...
 |
| Opening an inspection panel... |
... and BINGO!! I discovered the same "immature" or "uncured" (Excuse the experts, but I don't know how to define this type of material in any other way...) resin forming the inner portion of the driver's station roof. With my fingernail, I was able to pull "oily chips" out of this resin, in an attempt to remove this "contaminated" material. I'm feeling like a Surgeon Oncologist....See the green arrow below...
 |
| The roof of the driver station, deformed by "immature" resin... |
My correction intention is to apply a piece of 2mm thick plasticard to the inner portion of the driver's roof, with superglue applied to the entire surface of the plastic, to lift, flatten and support this roof that is "collapsing"...
 |
| The problem and the cure... Plasticard with 2mm thick which will be glued to the inner portion of the driver's roof. The idea is to "anchor" everything with an ice cream stick... |
 |
| Plasticard being glued to the inner portion of the roof. Notice (green arrows) another internal laminations in the kit... These laminations did not deform the kit because the resin is not "oily" in these sectors... |
 |
| Testing the ice cream stick anchor length... The objective is to anchor the plasticard against the ceiling (red arrows), resting the stick on the remnant of the ventral shield (green arrow) while the glue dries! |
 |
| Achieving a rectification of 90%, in my opinion... The left portion of the ceiling still has a slight depression... Much better, but still noticeable. I'll try to rectify that later with some local heat... |
 |
| With the rectification, the fractures became more evident...(red arrows) This is easy to fix with a superglue filler and then putty. |
 |
| The superglue marks (cyanoacrylate)... I'll sand it down and then fill it in with putty... Easy as slapping a drunk guy... |
Honestly, due to the damage presented, I think that my kit represents what disappeared in Tripolitania, Libya, in 1919!!!
But continuing the construction: after repairing the roof of the driver's station, we go to the hull, or rather to the lower armor of the tank. Remember the softened resin? Well... the time has come to resolve this issue...
 |
| Modeling cancer: uncured resin... Let's eradicate this disease!!! In red, the lower armour that will be replaced. In blue, the inoperable cancer... Good thing it won't be visible when we build the suspension... |
My intention is to remove all "contaminated" armor, to replace it by a plasticard plate. For this, I'm going to use a circular saw on my Dremel. This tool is EXTREMELY DANGEROUS. Just use with great care and training...
 |
| The surgery will be performed on the line demarcated by the red arrows... |
 |
| Let's separate the bone from the meat... |
 |
| Surgery performed. Man, this circular saw is very good, but it's scary to use it!!! |
 |
| The cancerous portion excised... A pity that the part in blue can only be repaired... Caesar approved the conduct!!! |
After the cut (which was done as flat as possible...), I rectified any irregularities by passing the complete hull through my sanding plate (a sheet of sandpaper glued to a glass plate). The important thing is that everything is flat...
 |
| Sanding and leveling the irregularities of the cut. Alternating back-and-forth and circular movements (see below)... |
 |
| Resin responds very well to sanding. Our Emperor is still satisfied!!! |
 |
| Result of sanding grinding... Perfect!! |
 |
| Side view... |
 |
| Using two Plastruct Styrene tubing with 6,4mm diameter for structural reinforcement of the hull. The reinforcements were installed in the direction of the suspension supports |
 |
| The structural reinforcements of the hull must face the lower portion of the armor. |
 |
| Application of a thin Plasticard plate (0.3 mm thick), glued with superglue, respecting the vehicle's squareness. The excess (red arrows) will be cut off after the glue dries. |
 |
| A new ventral armor plate with no signs of cancer!!! The vehicle is cured of the plague!! Caesar grants life to our Italian Gladiator!! |
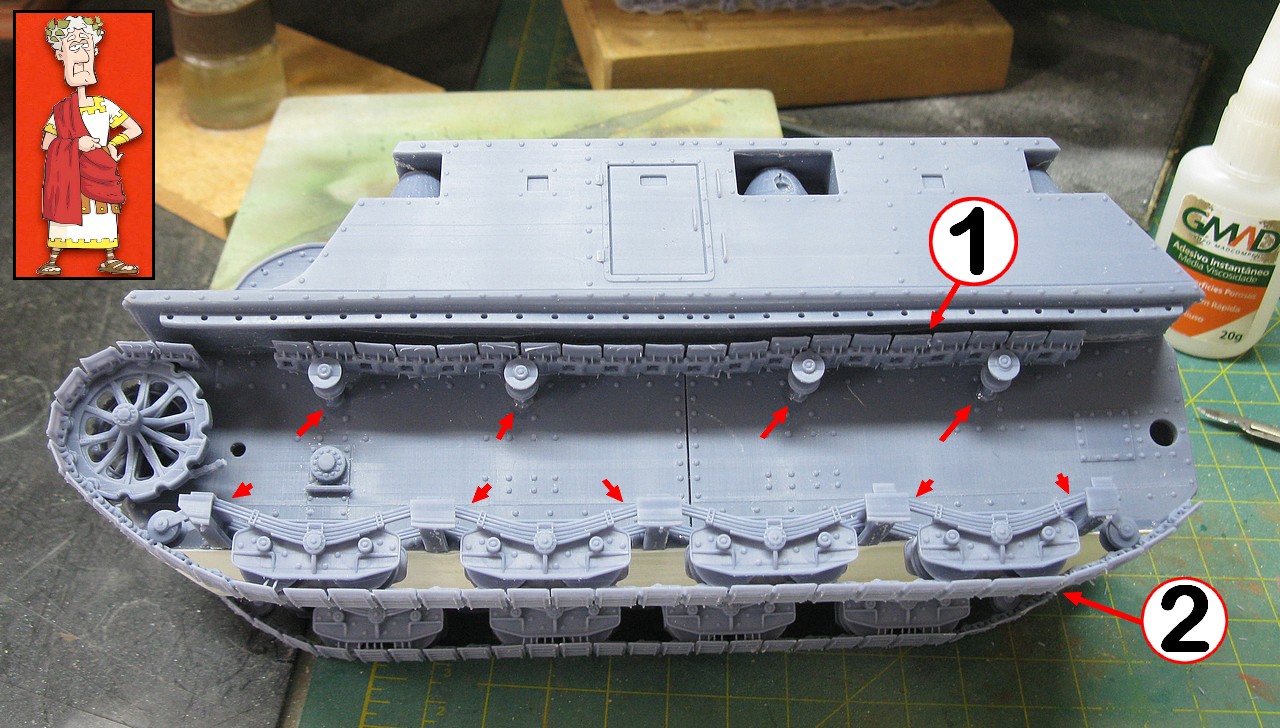
Well, with the cancer problem solved, let's get to our girl's polytrauma problems. Let's fix the two suspensions that came fractured. The right suspension has a complete fracture in the track links region, just below the drive sprocket. And another incomplete fracture at the last wheel set of the last bogie, close to the idler wheel. See photo below:
 |
| Right suspension. Internal view. Notice the complete and incomplete fractures (arrows) |
The good news here is that the fracture edges are clean with no loss of substance, allowing alignment and bonding with just a little more care when gluing. The use of cyanoacrylate solved everything. The slight warping of the suspension will be corrected during the positioning of the part on the tank chassis. An honorable mention to Luis Vargas' kit: the delicacy and detailing of the piece is impressive. Very beautiful piece. My suggestion is that the packaging of these pieces be better taken care of, to avoid this type of problem for the modeler. I consider myself an experienced modeler and I find these problems feasible to solve, but a colleague who is new to the hobby can simply get discouraged and abandon the project.
 |
| The right suspension fixed!! Hail Caesar!! Those who will live glorify and salute you!!! |
 |
| And the right suspension gluen in the hull. The holes and markings help (a lot...) the correct positioning of such a large and delicate part. Detail: the infamous resin with curing problems strikes again, at the edges of the links (red arrows). This type of problem is solved by cutting these "petals" with a scalpel... I'm glad Caesar didn't notice... |
Now for the worst part: the compound fractures of the left suspension. Here, we have comminuted fractures with loss of substances and scattered bone fragments... A real emergency room...
 |
| Notice the extension of the fractures... But don't cry, Sophia. Our girl will be like new!!! |
My plan is to use the Fiat hull markings as a guide for the suspension reconstruction. First, I will install the upper portion of the track (step 1, below) and, based on ithe markings of the hull (little red arrows, step 2), glue the lower portion, together with the fragments of the disaster... Let's see if the reconstruction evolves in good terms...
 |
| Hmm..starting the reconstruction... Follow the steps... Caesar is not very confident... |
 |
| Once the large segments of suspension are installed, it's time to realign the parts that have come apart: two links next to sprocket wheel (yellow), the sprocket and drive chain (orange) and the last link next to idler wheel (green). Caesar is just watching, in a measured way!!! |
 |
| And all the reconstituted parts, together... The Emperor finally pointed his thumb up!!! |
 |
| Here, a little scare, but easily replaced by scratch... |
 |
| Beginning of reconstruction, with plasticard... |
 |
| And Julius finally cracked a big smile, with the final result of the surgery!! |
To relax, let's "close" the top deck of the tank, gluing this piece to the upper hull of the Fiat. And here, Monica was puzzled: what the hell are these two hatches doing here???
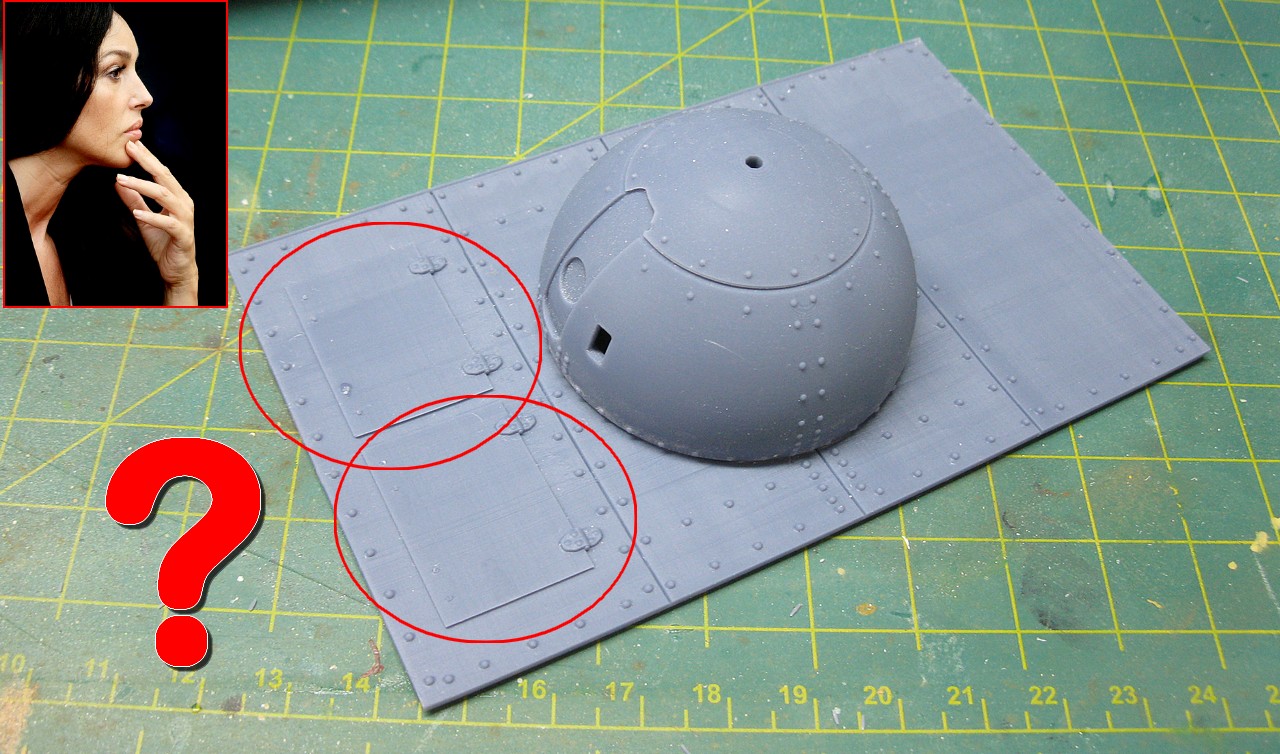 |
| Monica is confused... |
Looking at technical drawings, period photos and the reconstruction of the Fiat 2000 by the Italians in 2020, there is no evidence of these huge hatches here.

 |
| Fiat 2000 replica (2020) forward view: no roof hatches... |
 |
| Fiat 2000 replica (2020) rear view: no roof hatches... |
I'm not a rivet counter, but two hatches are a lot more than a few rivets!!! Let's be a little more careful with these details, Vargas!!!
 |
| I opted not to remove the hatches, but be warned for the purists... Julius César ( and Monica...) forgave my heresy... They are very happy with the project!!! |
 |
| I glued the two side armored skirts to the tank. While it hides a lot of the suspension details, it stays truer to the original and reinforces the structure of the kit as a whole. Our noble Roman roared "Beautifull !" (in Latin, of course...) front left view |
 |
| Fiat 2000 - front right view |
 |
| Fiat 2000 - front view |
 |
| Fiat 2000 - belly view |
 |
| Fiat 2000 - rear right view I agree: It is perfect! |
Putty around the driver's periscope and handles for the (weird) hatches. Since it's a what-if issue, I put the hatches on the forward deck and not the aft one, as per Vargas' instructions. Since we are in the realm of conjecture, the front region seemed more logical to me.
 |
| Putty around the driver's periscope and handles for the hatches. |
 |
| Primer time!!First, the kit was well washed with detergent as these 3D printed kits get a bit greasy... |
 |
| Right view |
 |
| Turret, main gun and machime guns with primer... |
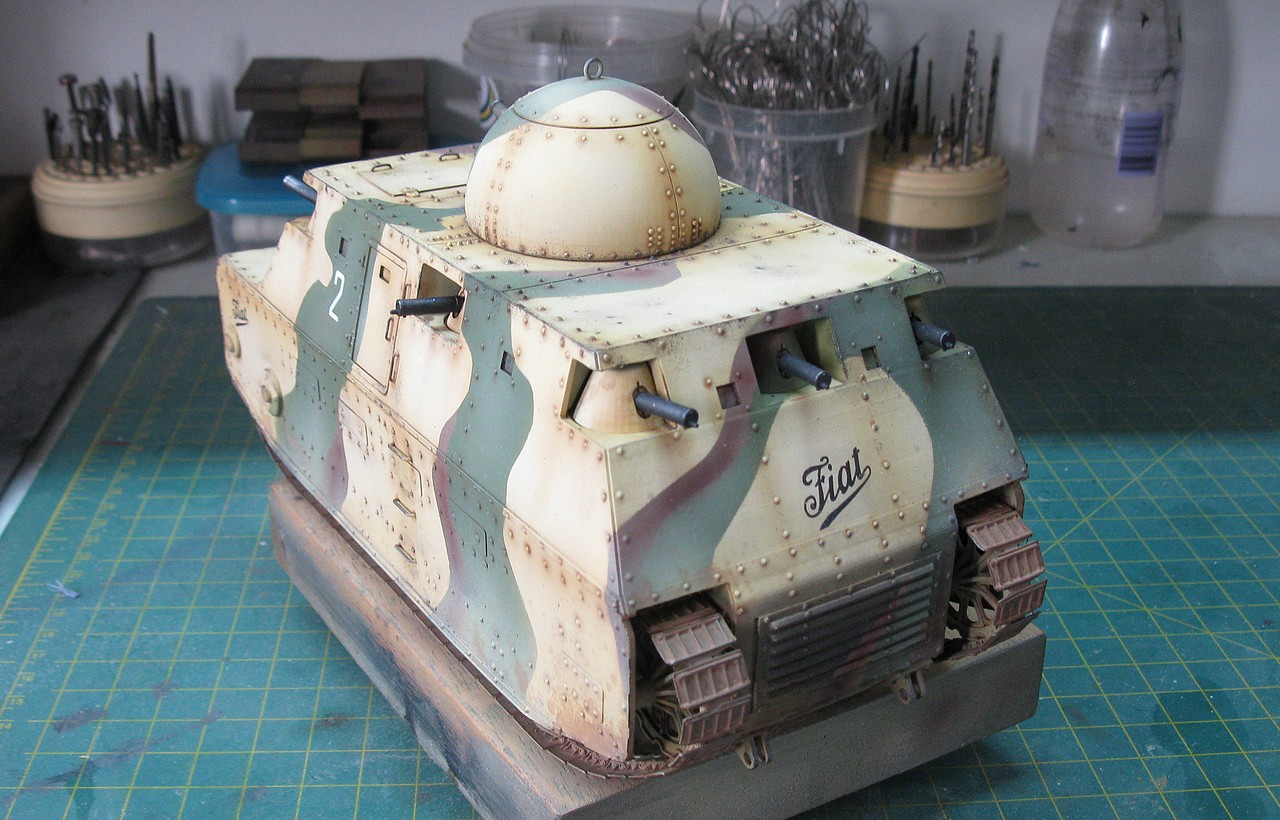
For the colors, I love this camouflage pattern:
 |
| Camo with sand-yellow, green and chocolat-brown. |
But really I would like to add a few more details on the marking of the kit (still based on real photos...not the faithful reproduction, but something that really could have been...). Something more or less like this:
 |
| Fiat 2000 - tank no. 2 - Testing a battle camouflage. |
 |
| Panzerserra colors & markings guide |
With that decided, let's get to the painting...
 |
| Starting by base-color: giallo sabbia chiaro (light sandy yellow) |
 |
| Some shades over the sand color.... |
 |
| Sophia is happy, now... |
 |
| Starting the painting masks... |
 |
| After the green color, masking for the chocolat-brown... |
 |
| And the "Battle Cammo" is ready!! |
 |
| The girl turns very beautiful!!! |
And after making the word FIAT in CorelDraw, I printed the Italian brand on a transparent decal sheet,in black. The number 2 came from my priceless scrap box of decals...
 |
Fiat 2000 heavy tank no. 2 left side |
 |
| Fiat 2000 heavy tank no. 2 front right side |
 |
| Fiat 2000 heavy tank no. 2 front left side |
 |
Fiat 2000 heavy tank no. 2 rear left side |
 |
Fiat 2000 heavy tank no. 2 rear right side |
 |
Fiat 2000 heavy tank no. 2 right side |
As we are going to start the weathering phase, one thing still bothers me about this kit: the turret is completely loose, without any locking system. As you know, I always try to find a way to allow the turret to rotate with some locking system, to avoid accidents (and the turret almost fell while I was painting...).
But I wasn't finding a good system for this, until I had an idea: how about using some elastic material to hold the tower? And, from the idea, let's execute!!! The concept came to mind when I remembered my airplanes powered by rubber bands when I was a kid...
First step: bend a metallic wire in the shape of a hook and glue it inside the tank turret with self-curing acrylic resin. Then, glue (with cyanoacrylate and acrylic resin) a sprue bar on the inner portion of the tank chassis, right in the center of the turret ring. The idea is to pass a rubber band under the sprue and, with long tweezers, pull this band to the hook.
 |
| Schematic drawing of the "Panzerserra Turret Retaining Elastic Apparatus". |
 |
| The "Panzerserra Turret Retaining Elastic Apparatus" under installation... |
 |
| The use of long tweezers is essential... |
 |
| The folded rubber band in position... |
 |
| And the turret in its place, pulled gently by the rubber band... |
 |
| Shaking the kit, upside down... All ok!!! |
 |
| And the turret turning, no problem. Monica was finally able to smile, relieved... |
And since we are in the final stretch of the project, I discovered in my catacombs these two metal shackles, which were a little big for my tanks, but still a little tight for the Fiat. But nothing a pair of round nose pliers and a little whim can't fix... RB Models old stuff... Too bad they're out of production right now...
 |
| Panther shackles (#8244) from RB Models. In the wood base, the standard one. In the tank, the expanded version... Too bad I only have two left... |
 |
| The two shackles in position... Stronger than that only Crom!!! |
 |
| And the Fiat 2000 heavy tank, with weathering starting and pigments being applied... What a badass italian girl!! Che ragazza tosta!! |
 |
| Fiat 2000 heavy tank left view |
 |
| Fiat 2000 heavy tank rear left view |
 |
| Fiat 2000 heavy tank rear right view |
 |
| Fiat 2000 heavy tank right view |
 |
| Fiat 2000 heavy tank Now I remembered what this girl reminded me of!!! |
And the Italian girl got ready. I present to you Carro Armato Fiat 2000 heavy tank (number 2), in its battle garb when on duty in Italy at the end of 1918.
 |
| Carro Armato Fiat 2000 heavy tank - number 2 Italy - late 1918. |
 |
| Carro Armato Fiat 2000 heavy tank front left view |
 |
| Carro Armato Fiat 2000 heavy tank left view |
 |
| Carro Armato Fiat 2000 heavy tank top left view |
 |
| Carro Armato Fiat 2000 heavy tank rear left view |
 |
| Carro Armato Fiat 2000 heavy tank rear right view |
 |
| Carro Armato Fiat 2000 heavy tank right view |
 |
| Carro Armato Fiat 2000 heavy tank front right view |
 |
| Carro Armato Fiat 2000 heavy tank |
 |
| Carro Armato Fiat 2000 heavy tank with Kojak and Rover, the dog. |
 |
| The girl is big... |
 |
| From the impossible encounters series, compare the size of the Fiat 2000 with a Sherman Firefly VC |
 |
| Really, this italian tank is very big!!! |
 |
| Carro Armato Fiat 2000 heavy tank - number 2 Italy - late 1918. |
Caesar liked it...

... and me, too!