
Time to get stuck in, lads!
%20joke.jpg) |
| Cromwell ARV Mk.I a little joke with IWM - MH 3665 |
Armoured Recovery Vehicles (ARVs) can be considered the unsung heroes of mechanized warfare since the advent of tanks. The need to recover damaged or bogged-down combat vehicles (friendly or even enemy) from the battlefield quickly and even under fire became apparent almost as soon as the first tanks saw action during World War I.
 |
| French army examining a captured German A7V tank - 1918. |
 |
| German soldiers make preparations to recover a knocked out a British Mark IV after the Battle of Cambrai - December 1917 Bundesarchiv Bild 104-0941A |
%20tank%20captured%20by%20the%2026th%20Australian%20Battalion,%20at%20Monument%20Wood,.jpg) |
| German tank A7V MEPHISTO (506) captured by the 26th Australian Battalion, at Monument Wood, near Villers-Bretonneux France - 14 July 1918. |
The early attempts at recovery were improvised, using other tanks or general-purpose tractors, but these methods were inefficient and often put more vehicles at risk. The interwar period saw some targeted efforts, but it was with the advent of massive mechanization and the scale of tank warfare in World War II that the need for dedicated ARVs materialized. Tanks were becoming heavier, more complex, and more important to the tactical development of operations, which created an urgent need for recovery and repair of these machines. Leaving a disabled tank on the battlefield not only represented a significant moral and material loss, but it could also become a weapon for the enemy when recovered and repaired by them. Thus, most major combatants developed their own designs for ARVs, often based on existing tank chassis to ensure commonality of parts and armor protection for the crew. The British, with their vast experience in tank development and deployment, were aware of this need.
The Cromwell tank, a cruiser that entered service in 1944, became an ideal candidate for conversion into an ARV due to its good speed, powerful and reliable Meteor engine, and robust chassis.
 |
| Cromwell A-27 cruiser tank from Guards Armoured Division B Squadron of Welsh Guards Regiment. early 1945. |
The Cromwell ARV, officially designated Tank, Cruiser, Cromwell, ARV MkI, was a relatively straightforward conversion. The turret, with its main armament, was removed. In its place, closing the turret hole, a simple double flat hatch was installed to facilitate the movement of the vehicle's recovery crew.
 |
| Cromwell ARV Mk. I - front view Notice the big double double flat hatch closing the turret hole |
.jpg) |
| Cromwell ARV Mk. I - front left view font: IWM (MH 3665) |
 |
| Cromwell ARV Mk. I - rear right view font: IWM (MH 3666) |
To provide leverage and assist in lifting, a sturdy boom or demountable 'A' frame (jib crane) was carried on the aft deck and could be raised at the bow of the vehicle. This allowed the ARV to lift components such as engines and transmission parts, or to assist in the recovery of overturned vehicles. The Cromwell ARV did not have an internal winch, but instead had a system of pulleys and ratchets that allowed objects to be manually lifted.
 |
| Cromwell ARV Mk. I with the A-frame installed in the nose of the hull. |
The crew of a Cromwell ARV consisted of a commander, a driver, and several recovery specialists.
.jpg) |
| Cromwell ARV Mk.I driver - 7th Armored Division REME - Villers Bocage, Normandy - 16-06-44. Notice the 7.92mm BESA machine gun mounted on the front of the hull. font: IWM A70 49-4 |
The vehicle was equipped with a variety of tools, spare parts, and cutting equipment to perform on-site repairs or prepare vehicles for towing. Their role was fraught with danger, as they typically operated in forward areas, often under enemy fire, to recover valuable assets.
.jpg) |
Cromwell ARV Mk. I towing a damaged Cromwell tank from the 8th King's Royal Irish Hussars in the Normandy hedgerows - 16 June 1944. font: IWM A70 49-4 |
 |
| Cromwell ARV Mk.I extricating a bogged Cromwell tank of 1st R T R, 7th A D, near Echt - Holland - Operation 'Blackcock' west bank of the Roer River - January 1945 font: IWM HU99802 |
 |
| Cromwell ARV Mk I from 11th Armored Division towing a captured Panzer IV tank 8 July, 1944 font: IWM B 6519 |
 |
| Another angle of the same rescue seen above, with a Cromwell ARV Mk I from 11th Armored Division towing a captured Panzer IV tank 8 July, 1944 font: IWM B 6518 |
The Cromwell ARV was typically armed only for self-defense, carrying only its 7.92mm BESA machine gun mounted on the front of the hull. Their primary protection came from their armour, similar to that of the Cromwell tank from which they were derived. The Cromwell ARVs served British and Commonwealth forces from the Normandy landings onwards. They were vital in maintaining the pace of advances, ensuring that disabled tanks could be quickly withdrawn from the roads and battlefields or recovered for repair and return to service. Their speed and manoeuvrability, inherited from the Cromwell tank, allowed them to keep pace with armoured spearheads.
%20-%201st%20Royal%20Tank%20Regiment%20REME%20-%2030%20-%2010-%2044%20film%20IWM%20(A70%20187-4).jpg) |
| Cromwell ARV Mk.I roaring by in Dongen 1st Royal Tank Regiment - REME Netherlands - 30 October, 1944 font: IWM A70 187-4 |
Although not as glamorous as their battle tank counterparts, Cromwell ARVs played a crucial, often unseen, role in the Allied victory, exemplifying the crucial importance of logistics and battlefield recovery in modern warfare.
Specs:
 |
| Cromwell V Mk.I with the A-jib stowed on the rear deck |
 |
| Cromwell V Mk.I with the A-jib raised in front of the hull. |
| Tank, Cruiser, Cromwell ARV MkI | |
|---|---|
| Type | Armored recovery Vehicle |
| Place of origin | United Kingdom |
| Service history | |
| In service | 1944–1955 |
| Used by | British Army, Polish Army |
| Production history (standard tank) | |
| Designer | Leyland, then Birmingham Railway Carriage and Wagon Company from 1942 |
| Manufacturer | London, Midland and Scottish Railway, English Electric, Leyland Motors, Morris Motors |
| No. built | 4,016 (all versions) ARv´s: ??? |
| Specifications (ARV) | |
| Mass | 20 t (approx.) |
| Length | 6.35 m |
| Width | 2.90 m |
| Height | 2.04 m (approx.) |
| Crew | 5 (Commander, driver, hull gunner + specialists |
| Armour | 57-64 mm on the hull front 43 mm hull sides 32 mm hull rear |
Main armament | none |
Sec. armament | 1 × 7.92 mm Besa mg with 2.250 rounds |
| Engine | Rolls-Royce Meteor V12 petrol - 600 hp (450 kW) |
| Power/weight | 30 hp/tonne |
| Transmission | Merritt-Brown Z.5 gearbox 5 fwd. x 1 rv. |
| Suspension | Improved Christie |
| Ground clearance | 410 mm |
| Fuel capacity | 530 L + optional 140 L) aux. |
Operational range | 270 km on road 130 km off road |
| Maximum speed |
|
 |
| British Cruiser Tank Mk.VIII, A27M - Tamiya (#35221) box art |
 |
| Cromwell ARV conversion set - Panzershop (#PS35295) box art |
 |
| Kojak, ready for action... |
 |
| Panzershop booklet, with parts and construction steps... |
 |
| A truly Spartan manual, no doubt...but intelligible. |
 |
| The resin parts... |
 |
| Well injected, no bubbles. Here, a fractured portion, but I located the fragment in the bag and glued it... No problem... just a little frizz. |
 |
| Some cleaning work ahead, but normal for this type of conversion kit... |
 |
| Starting the grafting phase, with the Tamiya chassis receiving the polyurethane resin rear armor. The clamps keep the parts aligned during gluing. rear left view |
 |
| Rear right view. The resin part is very well injected and aligned, without warping or flaws. |
 |
| Front left view. The resin part is very well injected and aligned. |
 |
| The part that supports the rear tow hook appears to have contracted. |
 |
| Cutting the vertical anchoring eyes of rear armour. The new positions marked with pencil. |
 |
| The vertical anchoring eyes of rear armour glued with superglue in the new internal positions. |
 |
| The problem solved!!! Adding Tamiya details... |
 |
| Surgery in my the front fender portions, like the real ones. front left view |
 |
| Surgery in my the front fender portions. front right view |
 |
| Building the main pulley assembly of the Cromwell ARV: resin parts and PE parts, very well built... |
 |
| The big hatch and rear right toolbox in position |
 |
| The stability of the toolbox is complicated, as only 6 PE legs keep it in position. Be careful when handling the kit... |
 |
| The vehicle has a flattened appearance, like a cockroach... Very cool!!! Tool racks are quite fragile. Right rack installed. |
 |
| Tool racks are quite fragile. Left rack installed. Notice the wood plancks in the right rack |
 |
| I decided to build the kit with the big flat hull hatches closed, as the Tamiya kit has no interior details. |
 |
| Jerry can racks in PE... |
 |
| ...and glued in position. |
 |
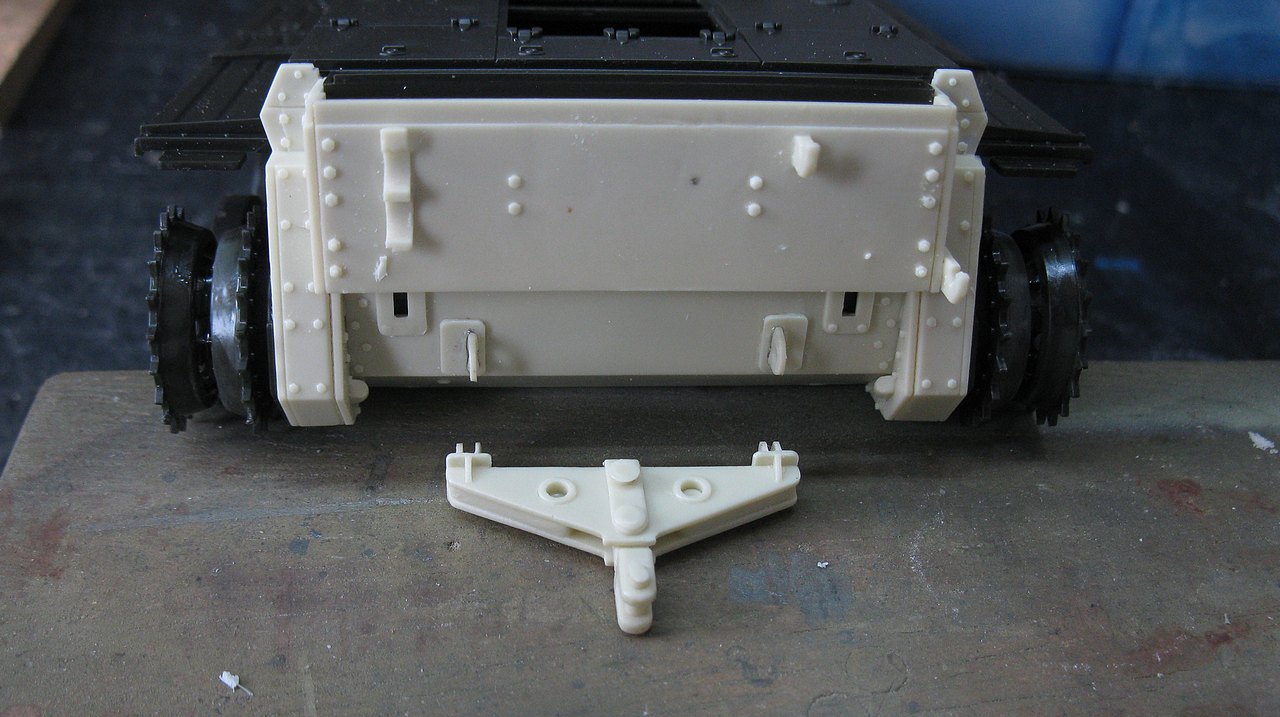
| To save space in the display case, I decided to build the A-frame on the rear deck of the tank, disassembled. |
 |
| The two jib booms are aligned on brackets to the left of the large flat hatch. Note the wooden planks installed on their supports on the left fender. |
 |
| The vehicle, even though it is an engineering and support vehicle, has an aggressive and impressive appearance, like a badass! |
 |
| I'm really enjoying this project!!! |
 |
| Cromwell ARV Mk.I, under construction - left side view |
 |
| Steel ropes from R.M.G. Resin Models. I will fit the metal wires into the original Tamiya plastic terminals. |
 |
| Keeping the original Tamiya plastic terminal stable to glue with superglue the copper wires from RMG Resin Models |
 |
| Making the long single cable and the double cable with the original Tamiya plastic terminals and the copper wires from RMG Resin Models |
 |
| Coupling detail: simply fantastic. Well done, RMG Resin Models!!! |
 |
| And installing the cables in their places... |
 |
| The cables flex wonderfully!!! Very good indeed!!! |
 |
| And since we are talking about metal, let's continue applying the PE details: toolbox locks!! |
 |
| The kit is both simple and sophisticated... |
 |
| Easy and quick to build... |
 |
| ...and now, ready to be painted. |
 |
| Panzerserra colors & markings profile |
 |
| Shades of green...left front view |
 |
| Shades of green...right front view |
 |
| After Pledge, decals from Black Bulls, Recce Regiment!! |
 |
| Front view |
 |
| Right view |
 |
| Rear view |
 |
| The Allied Star decal was applied using Microset and Microsolv, from Microscale Industries, to soften the film. The damaged areas will be retouched later with a brush. |
 |
| The Allied Star decal retouched with attenuated white paint with a minimum amount of gray. |
 |
| Applying weight to the tracks. Popsicle stick technique. Something extremely sophisticated... right side view |
 |
| Applying weight to the tracks. Popsicle stick technique. Purists have convulsions seeing these images... left side view |
 |
| Final touches...Notice the two logs of trees in the rear deck: straight Pomegranate (Punica granatum) branches. |
 |
| The radio antenna is an acupuncture needle... |
 |
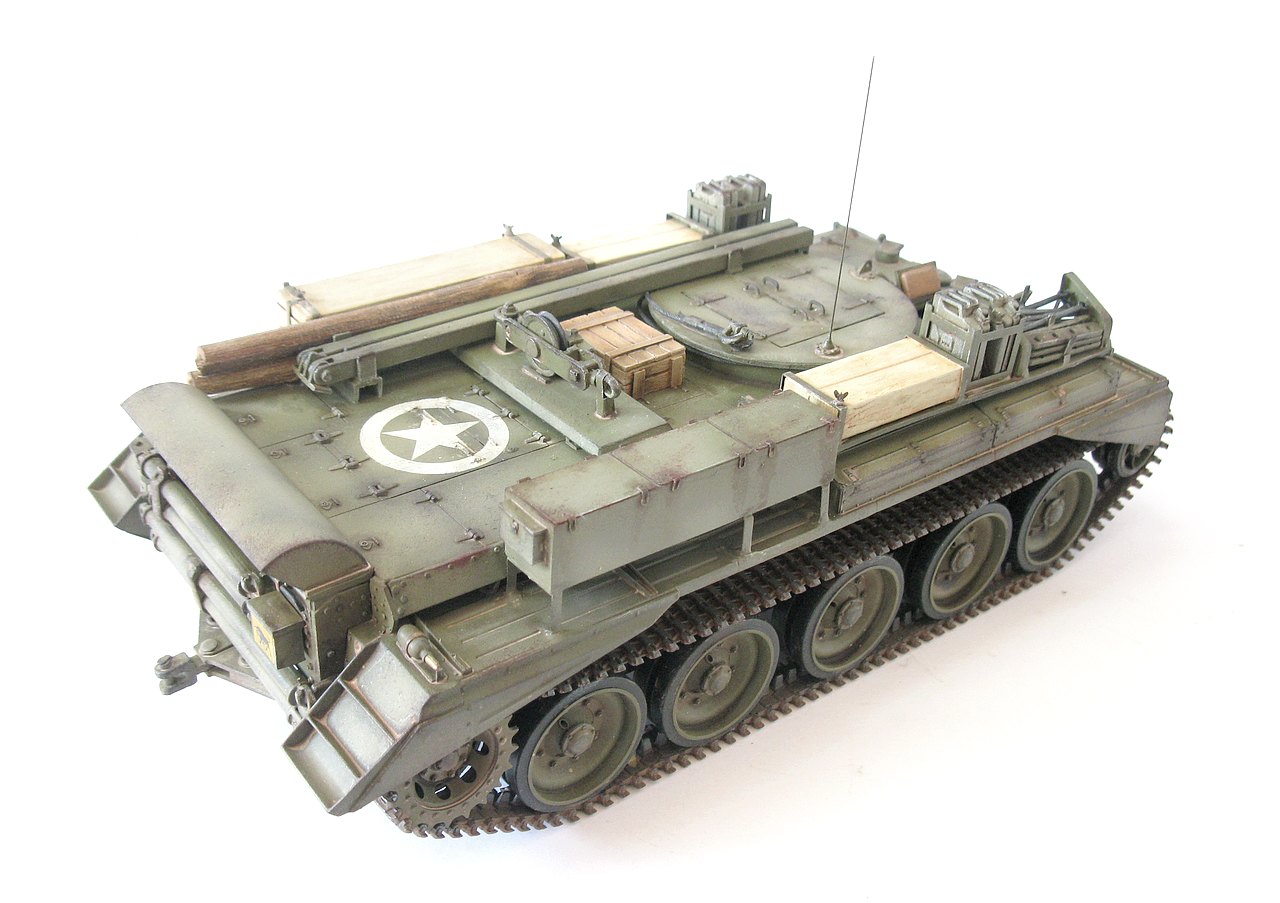
Cromwell ARV Mk.I -11th Armoured Division. 15th/19th Armoured Recce Regiment (The King Royal Hussars) C Squadron - France, September 1944. |
 |
| Cromwell ARV Mk.I front left view |
 |
| Cromwell ARV Mk.I front left top view |
 |
| Cromwell ARV Mk.I left view |
 |
| Cromwell ARV Mk.I rear left view |
 |
| Cromwell ARV Mk.I rear right view |
 |
| Cromwell ARV Mk.I right view |
 |
| Cromwell ARV Mk.I rear right top view |
 |
| Cromwell ARV Mk.I front right top view |
 |
| Cromwell ARV Mk.I front right view |
 |
| Cromwell ARV Mk.I with Kojak, in driver station. |
 |
| Cromwell ARV Mk.I with Kojak |
 |
Cromwell ARV Mk.I -11th Armoured Division. 15th/19th Armoured Recce Regiment (The King Royal Hussars) C Squadron - France, September 1944. |
