Tankers:
Just for fun, it1s time to build another Chibi-tank or Toon tank: the vehicle is the
M4A1 Sherman - E type - CDL (Canal defense light) tank. If you want to know more about this rare machine, take a look
here at Bunker, in this article.
But let's start the job ... The logical base for this project wouldl be the amazing
MENG's Sherman U.S. medium tank M4A1(#WWT002), just like
my previous work on this TOON tanks series.
 |
| Sherman M4A1 TOON tank - MENG (#WWT002) |
But because these Chibi tanks are selling like cold mineral water in the desert, I didn't find any in the stores I usually buy. But I found this cutie:
 |
| Sherman M4A1 TOON tank - Christamas Edition - MENG (#WWV002) |
It's the same kit, but with different (and bright... ) colors and decals (Santas is a bonus...). But as I am going to paint all the tank and apply new decals, let's work with this unobtrusive pretty lady... The conversion kit will be this amazing turret printed in 3D by
K Scale Models.
 |
Chibi Defense Light (CDL) turret conversion for MENG M4A1 WW Toon tank
(KScale Model finished model and pic) |
The kit comes in this reinforced cardboard box, with the turret and lifting rings in individual plastics, well packaged and protected by many styrofoam flakes. My kit came with two leds and a battery receptacle for turret lighting, as gift. Thank you, K Scale Models !!!
 |
| K Scale Models box it |
 |
| Box content: 3D printed turret and electric stuff... Kojak is amazed... |
 |
| I was almost forgetting the lifting rings... |
 |
| Turret's top view... |
 |
| The details of this 3D print is very good!! |
 |
| Electric components.. A true challenge for the Bald one!!! |
 |
| The its for this project... Santas will be used on another occasion... |
The first thing I did was cut with my Dremel and a steel disc all the excesses of 3D printing. I also decided to remove the cylinder from the center of the turret base, as this will make sanding the base easier, so that everything is very flat and smooth ...
 |
| The turret base without the central cylinder... |
 |
Without the cylinder, sanding and flattening the base is much easier...
A suggestion for K Scale Models: do this part separately on your printed turrets ...
The turret in my sandpaper device... |
 |
| Starting the sanding the two pieces with water ... |
 |
| Flat and smooth!!! |
One thing that is bothering me about this project is that MENG's M4A1 toon tank is an early tank, small-hatch type. And the original CDL tank chassis was a late type M4A1, with big-hatches for the driver and the assistant driver. I'm not a fanatical rivet counter, but I like to modify my kits as close to the real as possible. And trying to convert a TOON-tank from Early to Late is still a tasty challenge ... Let's do it !!!
The first thing to do is to fill the interior of the hull's "tub" in the hatch regions for subsequent surgery of material removal, to remodel this area. As the kit is a TOON-Tank, of course that the task will not be of absolute precision, but my intention is to redesign the hull front-glacis to something that refers to the big-hatch tanks.
For this filling, I will use the technique that dental laboratories use, which is the application of self-curing dental acrylic. The technique consists of self-curing dental acrylic in the form of powder and liquid in two close containers: you "wet" the brush in liquid acrylic and with the brush "wet" you touch the acrylic powder. A portion of this powder is captured by the "wet" brush and you can transport and deposit this drop of acrylic (powder + liquid) to the desired location...
 |
The small-hatch hull, self-cured acrylic(powder and liquid) and a old brush...
Notice the right "bathtube" of right hatch filled with acrylic... |
 |
After dip the brush in the liquid, I will capture a portion
of powder, with the moistened brush ... |
 |
The powder drenched in liquid at the tip of the brush. This mixed acrylic will be deposited at the desired location ...
The acrylic adheres by "welding" to styrene plastic ... |
 |
| Dropping the acrylic in the cavity of driver's small-hatch ... |
The two cavities filled with dental acrylic. Do not overdo the amount of liquid as it may melt the styrene of the kit, either by its chemical composition or by hardening of the acrylic (exothermic reaction). A large amount of acrylic generates a large amount of heat... Add small layers of acrylic to prevent this accident ... And don't forget to clean the brush with liquid acrylic, otherwise you will lose the brush when the acrylic hardens ...
 |
| The two cavities full of acrylic... |
 |
Depositing acrylic on the outside of the small-hatch hull for future plastic surgery.
Same brush technique as previously described |
After hardening of the acrylic (about 10 minutes), we can wear and carve the hull with abrasive tools from Dremel. Acrylic is much harder and denser than styrene plastic of the kit. You can only wear acrylic with abrasive tools or sandpaper... The scalpel is almost inefficient in this case ...
 |
Starting the plastic surgery with Dremel tool (blue arrow) . The scalpel is used only to scrape and smooth the plastic.
Does not work on the hardest acrylic ... |
 |
| Reshaping the typical bulge of the small-hatch front glacis - Right side |
 |
| Reshaping the driver's assistent station bulge for a more rounded look typical of big-hatch... |
 |
| The surgery done in the two stations: Big-hatch!!! |
 |
Using the same drop acrylic technic to plug the holes of the (horrible) side handles (nonexistent ...)
of the M4A1's hull sides |
 |
| Holes closed... One less heresy !!! |
And since we're getting as close to the actual M4A1 CDL as possible, let's remove the additional armor plates from the kit's hull. The actual M4A1 CDL didn't have that additional protection. These parts will be removed with Dremel abrasive tool and subsequent sanding ("X" in green) . The rear fenders are not characteristic of this particular tank either ...
 |
| Notice putty in the side hull holes (grreen arrows) and plastic surgery in the rear fenders (blue arrows) |
 |
| The hull side: flat and smooth, like the actual vehicle... |
 |
| Notice the front shape of the hull: big-hatch!! |
 |
| The TOON-Tank big-hatch M4A1 is borning... |
 |
| Final sanding on the now (and new) big-hatch Toon-tank hull. |
 |
Testing the turret CDL in the toon-tank chassi...
Notice my M4A1 CDL tank in 1/35 scale in background |
You know I love to modify my kits ... Even though the K Scale models turret is very detailed, I decided to do some upgrades on it so that I (and Kojak ...) would be more pleased ... One of the things that I want to change is the rear hatch, which is just carved into the back of the turret. Since all the turret and hull hatches are embossed, I will make the circular hatch embossed as well. And since I am modifying the rear portion of the turret, I will replace the rectangular ribs on the rear (which had a slight print defect ...) with parts made with Plastruct, with the same shape and dimensions.
 |
The future surgeries: Make a new circular hatch (blue arrow) and
new rectangular ribs (red arrows0)... |
 |
| The surgery starts by rescribbing the turret's top grooves... |
To increase the TOON looks of the turret, I decided to add another 2mm height to the turret by adding two layers of 1mm plasticard to the base. In addition, I added a 1mm circle at the bottom, around to the central cylinder to raise the turret in its cradle so that the turret does not scrape on the armored engine shield and new big-hatches.
 |
| Increasind the turret height!! |
 |
| The new base view. In the central circle, I'll glue the cylinder and 1mm "collar" |
Like my
M4A1 TOON-75mm gun tank, I will change the bogies of the kit by others from my spare-parts box. This time, will be heavy-duty bogies
 |
True Frankenstein bogies: a mix of Academy and Dragon spare parts...
Notice the new sprocket wheels and idler wheels , too... Left side |
 |
| New heavy-duty bogies: right side |
 |
| The hull and the chassis... |
 |
| The new big-hatches and ventilators (middle and right side) |
 |
| New big-hatches ( 0,2mm platicard thick) |
 |
| The (horribles...) vynil M3 Lee Tamiya spare tracks, but much better than the toon-tank ones!!! |
 |
| Sooooo cute!!! |
Adding some details in the turret based on actual tank photos and the 1/35 model kit
 |
Adding Academy 1/35 .30 MG (green arrow) plus front pistol port , hatch handle and springs and aerial (blue arrows)
and from my spare parts box a true ventilator in the turret's top rear (red arrow) from Italeri |
 |
Turret's rear view: new 0,2mm rounded hatch (green arrow) with handles in cooper wire
Plastruct rectangular ribs and ventilators (red arrows) |
 |
| The turret in his place!!! |
 |
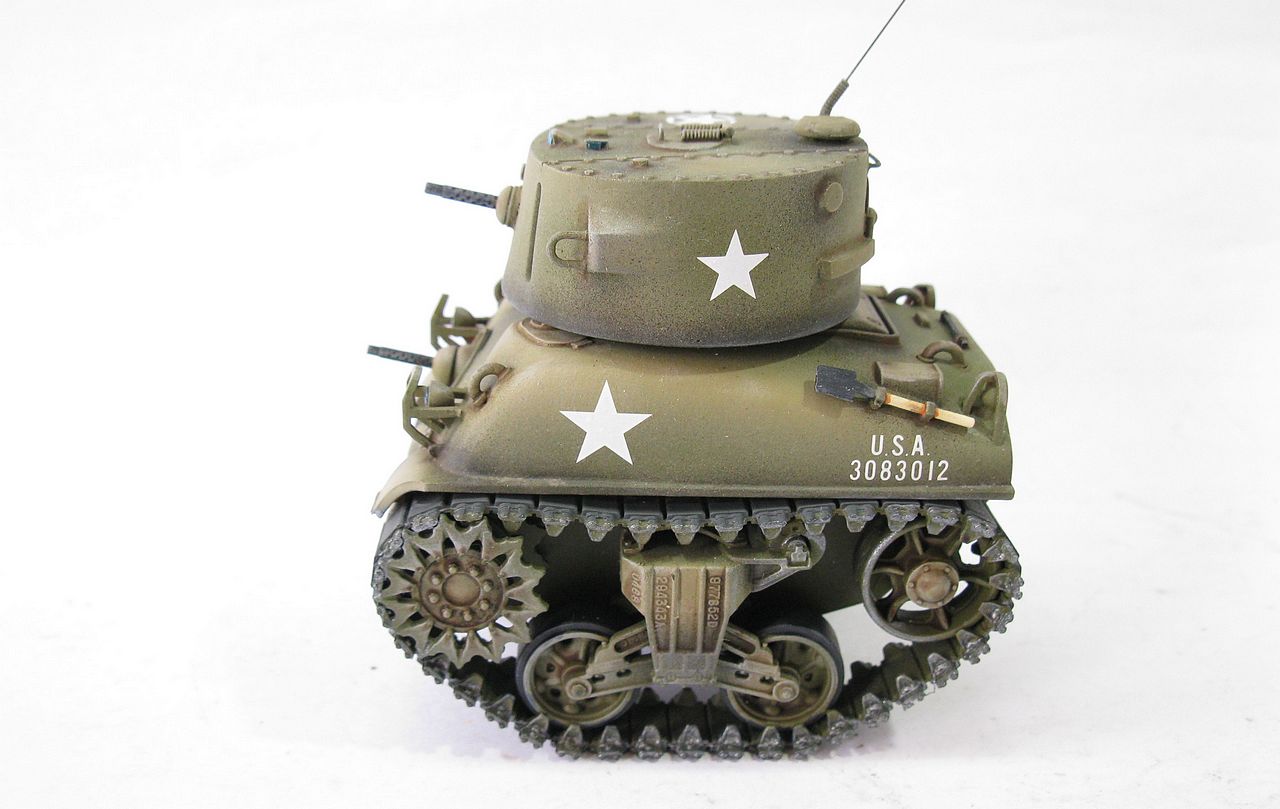
A terrible duo: M4A1 (75) toon gun tank and M4A1 CDL toon tank.
Notice the hull .30 mg from Dragon spare part (light gray) |


Nenhum comentário:
Postar um comentário