Well, Lads...
Welcome to my new project...
After receiving this beauty by mail:
Henschel 33D1 6x6 - ICM
I started researching about this sturdy evil-looking truck... But I would not want to build this beast OOTB!!! So, I found this:
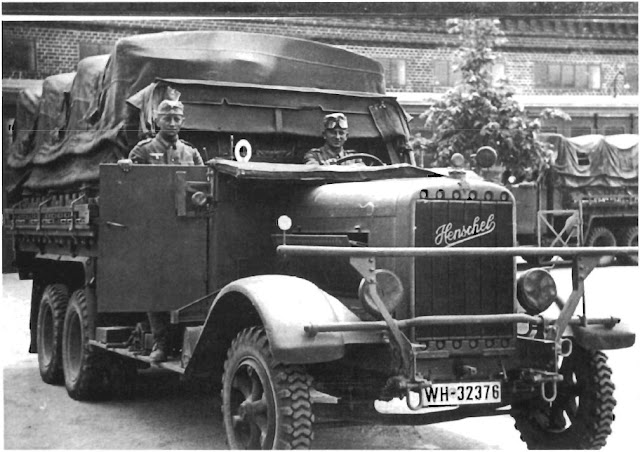
...and this:
 |
| Henschell D33 with closed cab (fuel tanker) in the Russian Front.. |
Time to scratch and fun !!!
All the parts:
 |
| The Henschel in the start line... |
Following the instruction booklet (for now ...):
 |
| Chassi and engine |
The spoked wheels are very well detailed ....
One downside: the quality of plastic. Very hard and brittle recycled plastic ... It seems that it was "burned" in the manufacture. Small parts break very easily. You must be very careful with the removal of parts of the "trees". I replaced the more fragile pieces by metal
 |
| replacing fragile plastic parts for copper |
The build of the chassi continues...
Chassi color: panzer-gray!!
After making the fuel tank and the front rack masters, handed the pieces to the Fabio, from Panzer Resin Models, to cast the parts to me, in resin. The rack is ready, first. With the body of old empty glue-pen Tamiya, I did an air reservoir:
And testing location:
The fuel tank in place:
... and detailing the tank and its mountings. As the resin tank is very heavy, I reinforced the rear axes with metal wires, transfixing the axes side by side.
 |
| detailing the fuel tank |
 |
| ducts and pipes... |
 |
| cranks and faucets.. |
 |
| fuel pump. All parts from my spare box of scraps |
I put most of the details of the kit and scratch a rack on sides of fuel tank:
The truck looks very stout:
Rear vision:
Because of the fuel lines, the spare wheels can not go in her original chassis crib.
I think I'll hold the spares (there are two ...) on each side of the engine bay. I do
leather straps to hold the wheels:
.Assembly line!!!
My cammo will be based on this profile:
Panzer gray streaked with green and dark-yellow spots. In the pics, the green hardly appears. But it's there. I can guarantee!
 |
Panzer gray with tonal variations. Tarp in khaki. Notice the fuel hose, which will be added ... |
 |
| Cammo aplied. Future and decals... |
 |
| Messerschmitt fuel...Faust is the name of the truck !! |
 |
| rear view |
 |
| right side |
 |
| front view |
 |
| Tarp in khaki |
This boy (Faust) is very sturdy ...
 |
| Bigger than a Shermie... |
And the Henschel fuel tank project also finished ... I applied the markings of the glorious Jagdgeschwader 3 "Udet", when in action at Stalingrad Front in 1942.
See you in my next project !!!!


 I started researching about this sturdy evil-looking truck... But I would not want to build this beast OOTB!!! So, I found this:


