Gents...
New weekend... new double project:
Two american 90 mm Gun Motor Carriages: The M36 Jackson and M36B1 Tank Destroyer.
 |
M36 Jackson GMC from 703rd Tank Destroyer Battalion
Ardennes, 1944. |
After build the
M4 Sherman with T26 turret, with his powerfull 90mm gun, made me want to build something with the 90mm gun. Looking in my closet, I dug out these old kits: The M36 from AFV:
 |
| AFV kit box |
This kit has a serious flaw: its rear upper-hull is wrong. The luck is that I have a kit of
TWS (Tank WorkShop), to fix this vehicle:
 |
| AFV kit plus TankWorkShop conversion kit |
...and the prehistoric Italeri M36B1 tank destroyer (#250)
 |
| M36B1, from Italeri...a very old kit |
History:
The M36 tank destroyer, formally 90 mm Gun Motor Carriage, M36, was an American tank destroyer used during World War II. American soldiers usually referred to them as TDs for 'tank destroyers. The M36 first served in combat in Europe in September 1944, and served until the end of the war; it also served during the Korean War, and in the armies of several other countries.
 |
| M36 in Ardenes |
With the advent of heavy German armor such as the Panther and Tiger, the standard U.S. tank destroyer, the 3in Gun Motor Carriage M10, was rapidly becoming obsolete, because its main armament, the 3in M7 gun, had difficulty engaging these new tanks past 500 meters. This was foreseen, however, and in September, 1942 American engineers had begun designing a new tank destroyer armed with the M3 90 mm gun. This was several months before any Allied unit encountered a Tiger in combat, as the British First Army in Tunisia was the first western Allied unit to encounter the Tiger I in the leadup to the Battle of the Kasserine Pass at the start of 1943, and well over a year before any US unit encountered a Panther in combat.
The first M36 prototype was completed in March 1943, with a new turret mounting the 90 mm M3 gun on a standard M10 chassis.
 |
| M36 prototype - M10 with 90mm gun turret |
After testing, an order for 500 was issued. The prototype was designated T71 Gun Motor Carriage; upon standardization the designation was changed to 90 mm Gun Motor Carriage M36 in June 1944.
Like all US tank destroyers, the turret was open-topped to save weight and provide better observation. Postwar, a folding armored roof kit was developed to provide some protection from shell fragments, as with the M10. The M36 had a large bustle at the rear of its turret which provided a counterweight for the main gun. Eleven additional rounds of ammunition were stored inside the counterweight.
It was not until September 1944 that the vehicle first began to appear in the European Theater of Operations. About 1,400 M36s were produced during the war. The need for 90 mm gunned tank destroyers was so urgent that, during October–December 1944, 187 conversions of standard Medium Tank M4A3 hulls were produced by Grand Blanc Arsenal. These vehicles, designated M36B1, were rushed to the European Theater of Operations and used in combat alongside standard M36s.
 |
| M36B1 Destroyer |
The M36 was well liked by its crews, being one of the few armored fighting vehicles available to US forces that could destroy heavy German tanks from a distance.
 |
| Fisher Body built 187 M36B1 Jackson tank destroyers. Note in the upper right corner of mantlet the four victory markings indicating this destroyer kill two Tiger tanks and two Panzer IVs. This M36B1 belongs to 654th Tank Destroyer Battalion. |
Specs:


| M36 Gun Motor Carriage Jackson |
|---|
| Type | Tank destroyer |
|---|
| Place of origin | United States |
|---|
| Production history |
|---|
| Designer | U.S. Army Ordnance Department |
|---|
| Designed | 1943 |
|---|
| Manufacturer | General Motors
Massey-Harris
American Locomotive Company
Montreal Locomotive Works |
|---|
|
|
|---|
| Produced | April–August 1944
October–December 1944
May 1945 |
|---|
| No. built | 2,324 (all models) |
|---|
| Variants | See Variants |
|---|
| Specifications M36 GMC Jackson |
|---|
| Weight | 28.6 metric tons |
|---|
| Length | 5.97 m hull
7.47 m including gun |
|---|
| Width | 3.05 m |
|---|
| Height | 3.28 m over AA machine gun |
|---|
| Crew | 5 (Commander, gunner, loader, driver, assistant driver) |
|---|
|
| Armor | 9.5 to 127 mm |
|---|
Main
armament
| 90 mm gun M3
47 rounds |
|---|
Secondary
armament
| .50 caliber (12.7 mm) Browning M2HB machine gun
1,000 rounds |
|---|
| Engine | M36, M36B1:Ford GAA V8 gasoline engine; 450 hp (336 kW) at 2,600 rpm
M36B2:General Motors 6046 twin inline diesel engine; 375 hp (280 kW) at 2,100 rpm |
|---|
| Power/weight | 15.2 hp/metric ton |
|---|
| Transmission | Synchromesh
5 speeds forward, 1 reverse |
|---|
| Suspension | Vertical volute spring suspension(VVSS) |
|---|
| Fuel capacity | 727 litres |
|---|
Operational range
| 240 km |
|---|
| Speed | 42 kph on road |
|---|
The kit:
As I said, the AFV rear hull is wrong. It's the same hull of the M10 kit. How I build the M36 operational (not the converted M10), the hull must be modified. The main difference is in the rear deck: motor hood- grille and rear armour are different. See draw below:
 |
M10 and M36 - Notice the rear hulls
Based in George Bradford drawing
|
The different hulls: AFV and TWS. Notice the plastic rear hull...The fuel caps and the grille. The TWS resin hull is correct in form, but my kit in particular, came seriously warped...
 |
| M36 AFV and TWS hulls...notice the resin hull warped |
 |
| The warpage is very serious. It's beyond repair by hot water ... |
As the warping areas involved in back and side of the hull were so big, dive the hull in boiling water not fixed the problem. The TWS hull, unfortunately, could not be used. Since the situation is desperate, desperate measures are the solution. I decided to remove the rear portion of the TWS hull (slightly warped) and "engraft" in the plastic AFV hull. Surgery is a good thing.
 |
| Cutting the rear portion of AFV´s hull |
 |
| Graft completed...The AFV´s hull corrected (and aligned!!) |
 |
| Using thin plasticard for internal reinforcement... |
 |
| M36 hull |
The rear armour also came with problems. As I was excited with the surgery, I continued the work, turning the AFV rear armour in its correct form, using the TWS part as a template.
 |
| The rear armour correction |
And the corrected upper hull is ready for action...
 |
| Notice the grilles, in the rear hull |
Today, I made a very unpleasant discovery: My AFV kit came without the "F" tree parts . They are pieces such as benches for the crew, handles, periscopes, headlight protectors, track grousers, etc ...Luckily, my scrap box is very assorted:
 |
| Benches and cockpit detais made by scratch... |
 |
| Closing the upper hull |
 |
| Internal view... |
 |
| I used TWS resin parts to substitute AFV missing parts. Cooper wire as used, too... |
 |
| Almost done... |
Another bad surprise: a injection defect in my turret...Uff..this kit seems to me that was cursed...
 |
| Injection fail... |
I fix the fail with plasticard and putty...
 |
| The correction and gaps filled with putty |
And the M36 Jackson is ready for paint.
 |
| The building finished. Now, it´s painting time... |
Well, the M36 Jackson is ready for paint. But I hate paint only one kit....It´s a waste of paint and time. I prefer build two kits and paint the couple...It's more fun and I empty out my closets (filled) faster.
For a parallel work, the most logical choice would be a similar vehicle to M36 Jackson... And immediately the M36B1, which I mentioned in history, appeared in my mind (187 additional vehicles were converted from standard M4A3 Sherman chassis with the M36 turret) . They served alongside the regular M36.
 |
| M36B1 in Germany, 1945 |
 |
| M36B1 details |
 |
| The first prototype. |
So, I opened an old, very old sarcophagus and found this mummy:
|
| M36B1, from Italeri...a very old kit |
 |
| Booklet instructions |
This kit is very old and primitive, with numerous flaws ... One is the type of wheel from suspension. In the kit, Italeri leverages the spoked wheels of the M4A1, while the correct wheels are the stamped , used by M4A3 chassis. Time to use my treasure chest: spare parts from others projects. I found stamped wheels from Dragon. Good !!!
 |
| Using spare parts from my supplementary box parts |
The suspension corrected, with stamped wheels. The M36B1 is growing...
 |
| The M36B1 chassis. Notice the M36 wait in background. |
Another very serious failure of this old kit is the lack of internal details, with the turret featuring a "basket" totally wrong. I really do not want to spend much time with this relic and fix the basket or "burn" an AFV kit just to use the turret right for me is heresy ...
A good option would be to disguise the interior of the turret. The installation of an armoured roof would be ideal. I found some pics, in Internet;
 |
M36B1 with armoured roof, in action. Semi-closed roof, similar to that used by the M36, below:
|
This M36B1 presents a very "crude" armoured roof:
 |
| Frames from Critical Past movie. See the improvised armoured roof - DISCUSSION ONLY |
But that's for the next steps of construction. Stay tuned ...
The Jackson is waiting and the M36B1 is evolving slowly ...The hull, with .30 in metal from RB Models:
 |
| M36B1 - Dry run in the turret |
 |
| M36B1 - using a grill from spare box |
I will use the turret AFV as a model for some external detailing the Italeri turret, which is very crude and bigger than the AFV.
 |
| M36B1 - armed and dangerous... |
I used my
M10 Dozer as inspiration to build the armored roof on the turret of my M36B1.
 |
| M36B1 with armoured roof in scartch. Notice the M10 dozer in background |
I did the roof with plasticard with 0,8mm thin. The shape is based on photos of M36 and M36B1 that I posted earlier ...
 |
| M36B1 - I added some little details in scratch, in the Italeri´s turret |
 |
| M36B1 Italeri with scratch - close-up |
Our friend "
Bizarre" ask to me: What do you use for ropes?
Well, Bizarre...Ropes in 1/35 scale always are a problem...I wore any sew thread brown or cream, but the appearance was always hairy ...
See below, my M10 Wolverine... I built this girl years ago...Notice the ropes, in the rear...very, very hairy !!!
 |
| Cargo ropes - hairy. Old pic |
One day I asked to my wife if she did not know a thread that was not hairy.
- Polyamide thread !!! - She said, quite naturally ....
 |
| Polyamide saw thread - the 8th wonder of the world ... and super-cheap ... |
 |
| 100% polyamide |
And voiláá ...
No more problems with the hairy ropes ...
Compare the pictures below of M10: before and after I replaced the old strings (hairy) by new polyamide rope. I am doing it gradually with all the kits from my collection ...
 |
| The same M10, with the "hairy" ropes substituted by polyamide thread...Much better. |
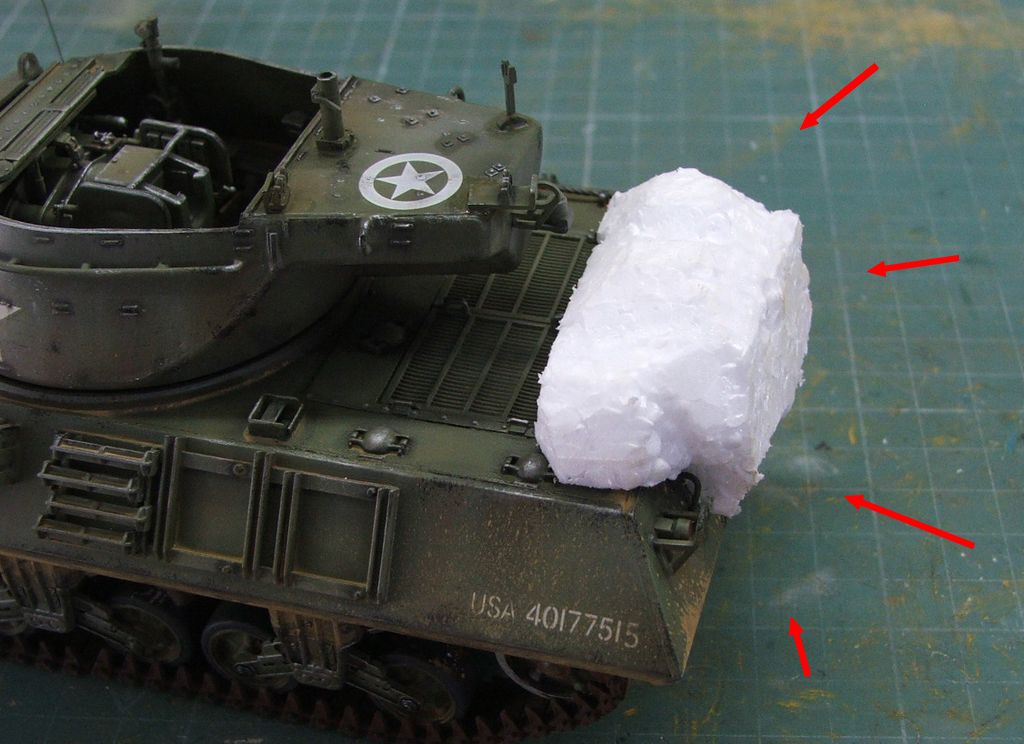
And now, stringing the cargos in the M36´s rear:
 |
| Canvas painted with oils and stringing with polyamide sew thread |
 |
| No more hairy ropes... |
Well, Gents. My M36´s double project is done !!!
The Girls:
M36B1 Gun Motor Carriage, with armoured roof:
 |
| The roll tarps were made with tracing paper, too... |
 |
| M36B1 |
 |
| M36B1 with Kojak, for size comparison... |
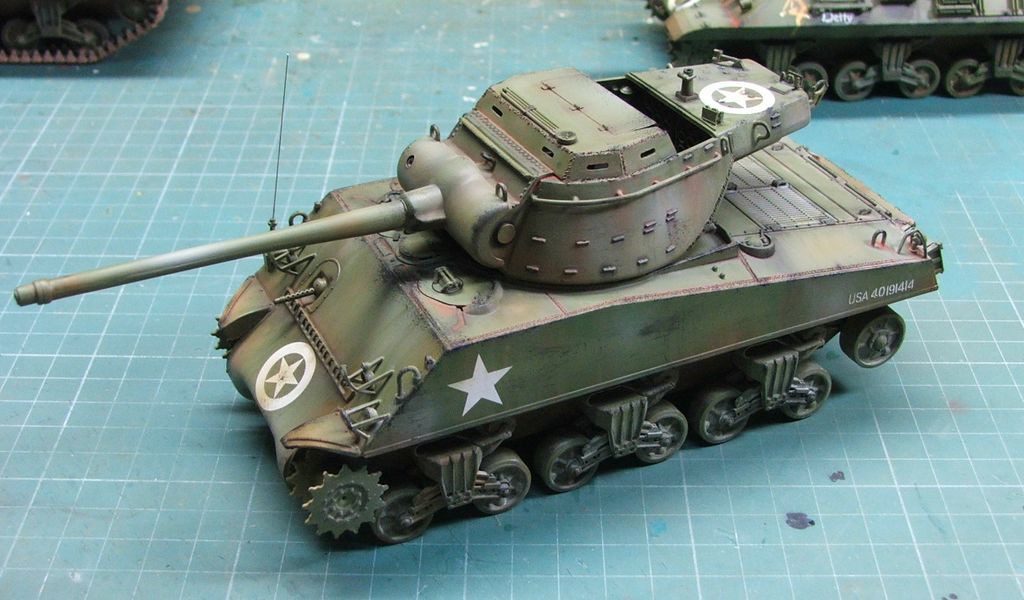
M36 GMC 90mm Jackson:
 |
| M36 GMC Jackson - Betty |
 |
| M36 Jackson and Kojak. |
And the two "destroyers" girls together:
 |
| M36 and M36B1 |
And the 03 destroyers of Panzerserra's nest!!!:
Thanks for looking...and hugs !!!


Excellent another interesting build, how do you manage to build your models so fast?
ResponderExcluirHi, Pete...
ResponderExcluirI use plutonium as fuel...
ehehehehehehehehehhehehehehehe
My secret is use fusers (Tenax 7R) as glue...and work a little, every night...A ant work...
Thanks for the incentive !!!
My son and I enjoy your website. Keep up the good work.
ResponderExcluirHi, Unknown... Thanks for your kind words...and big hug for your son!!!
ExcluirYour content is freaking amazing, man. Big respect! Keep up the good work! ����������
ResponderExcluirThanks, Anonimous!!! Thanks for the incentive!!! Hugs!!
Excluir