Tankers!!
Let's revisit a theme (the buses) but with a totally different approach...
In 2013
I showed to you guys a weird project that used one of the few options (at that time) to build a bus in 1/35 scale: the vaccuform. Today, there are on the market (Thank the gods) injected options on the scale 1/35.
In this project, I will use a Roden 1/35 Opel Blitz Omnibus W39 3.6-47 Type Ludewig-built Early version (kit # 807). My inspiration was the building of my colleagues
Andrew Tomlinson and
Przemo Mrozek. I had previously talked with Andrew who I thought of built a workshop version on my bus and the building of Przemo was an inspiration and coincidence. Many thanks to my colleagues for the tips and suggestions ...Let's have some fun !!!
History:
In 1939 Germany was rapidly preparing for global hostilities. The plans of the German command supposed an instantaneous capture of quite large areas of other countries, and therefore special attention was paid to the question of the greatest possible motorization of infantry units. Besides a large number of different types of trucks which were already in the Wehrmacht's inventory, staff buses also began to be taken on charge, whose main task was the conveyance of officers during offensive actions of the army with a likely prospect of minimal resistance by an opposing party in the conflict.
The practice of building buses on a truck's chassis had existed for a long time, and therefore the most common types of buses which came into the German's inventory were based on the most widely used trucks. One of the most popular trucks at this time was the well-known Opel Blitz, and on its chassis was designed a standard army bus (at the time the more common term for it was "omnibus").
 |
| Opel Blitz bus |
The Ludewig firm which was engaged in designing the bus, was located in Essen and had great experience in the manufacture of civilian multiseat vehicles. The standard chassis of the three ton truck was extended a little bit (up to 4450 mm), and the frame structure was reinforced.
 |
| Opel Bus chassis |
The original all-metal body of the new bus was quite elegant in outline, and only the front part where the engine was hidden, and the classic radiator with its distinctive logo, immediately reminded one of its predecessor, the famous "Blitz". Inside the cabin were several rows of seats which could be easily demounted if necessary (transportation of bulk goods, medical equipment, etc.).
Series production of the bus, officially designated the Opel 3.6-47 type W39, started in the second half of 1939, almost at the same time as the invasion of Poland by Germany and the start of WWII. At first, the number of vehicles produced per month was very small, but already in 1940 about one hundred units per month off were coming off the production line in Essen.
Series production lasted until mid-1943, when the situation became worse for Germany at the Front, basic industrial materials were in short supply, and as a result, Ludewig had to seriously simplify the structure of the bus. During this period 2,880 units of the early version were produced overall, which were sent both to the Eastern Front in Russia, and to the Afrika Corps of General Rommel in North Africa.
 |
| Opel Blitz bus in transport...She worked on virtually all fronts... |
 |
| Opel Bus in Afrika ... |
 |
..and in the Russian front. A Stalinetz S-65 tractor (captured)
tugging a stucked bus. A good idea for a diorama.. |
In addition to its main purpose - the conveyance of Wehrmacht officers - buses had to perform various other functions such as those of mobile headquarters, telephone exchange and radio station, mobile bakery and laundry, etc. Special note should be made of their role in transporting wounded from battlefield to hospital - rows of seats were removed and in their place several stretchers with wounded could be easily brought through the back door that opened into the interior, thus leaving space free for the installation of medical equipment.
 |
| Opel Blitz bus as command vehicle |
 |
| Opel Blitz bus in transport duties |
 |
| Opel Blitz bus with generator trailer |
 |
| Opel Blitz bus kitchen |
 |
| Opel Blitz bus ambulance |
Opel Blitz 3.6-47 buses were used by the army until the very end of the war, but immediately afterwards they quickly disappeared, giving way to more modern developments of the Opel concern during the early postwar years.(font: Roden)
 |
| Opel Blitz bus with cammo, in 1944. |
| Opel Blitz bus |
|---|
Place of origin Type
| Germany - 8.336 made
personal transport vehicle |
|---|
| Specifications |
|---|
Weight
| 2 t (bare weight) 6.0 t (total) |
|---|
Length
| 7.356 mm |
|---|
Width
| 2,248 mm |
|---|
Height
| 2,481 mm |
|---|
Crew
| driver + 28 men or 5 wounded with medical assistance |
|---|
|
Wheelbase
| 4.65m |
|---|
Gearbox
| 5 speed gearbox with low noise 4th and 5th gear, middle shifting |
|---|
Tires
| 190x20 (rear double 4x2) |
|---|
Engine
| Opel 6-cylinder 3.625 cc
75 Hp at 3200 rpm |
|---|
Suspension
| front: semi-elliptic, 10 leaf-spring suspension, forged I-profile with shock absorbers.
rear: semi-elliptic, 12 leaf-spring with shock absorbers. |
|---|
Speed
Eletric
| 90 km/h
6 Volt, 12 Volt from 1942 |
|---|
The kits:
As I said before, my idea would be to build an Opel Blitz bus adapted in the field as an itinerant workshop. For this project, I choose the Roden 1/35 Opel Blitz Omnibus W39 3.6-47 Type Ludewig-built Early version (kit # 807). To detail the project, I used the workshop's kits from Verlinden (#0584) and Italeri (#419).
 |
| The players in the bench... |
 |
| The engine. Detailed, but will be closed in the hood... |
 |
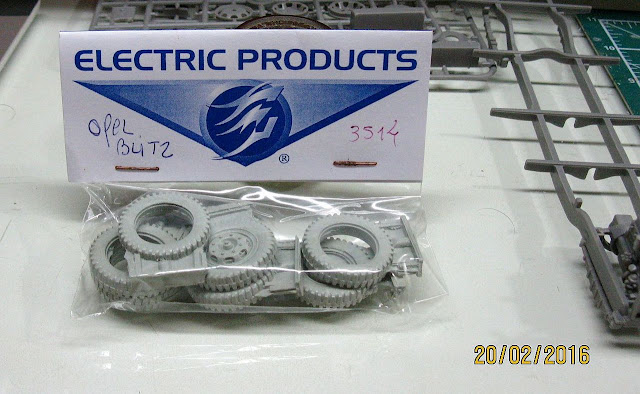
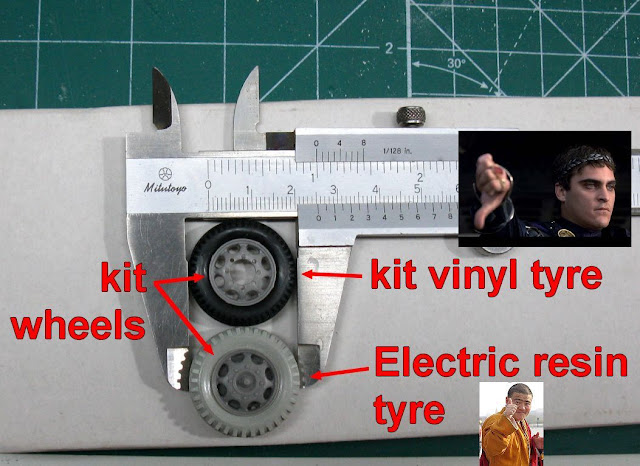
| The vinyl tires. It seems smaller than the resin, but not ... |
 |
| It seems narrower than the resin, but not ... |
 |
| Done... |
 |
The roof rack of my kit came warped ...
I had to replace it with a Plastruct plastic rod |
 |
| Much better!! |
 |
| Aligning chassis and suspensions ... |
 |
| Making a wooden floor with thin plastic strips !!! |
 |
| Building the tools cabinet from Verlinden. Heavy metal !! |
 |
| Almost done!! |
 |
| Building the resin workbench...notice the metal cabinet in background... |
 |
| Testing the internal layout....hmmm.... |
 |
Building and reducing the Italeri´s workbench....
Surgery time!!! |
 |
| Cutting!! |
 |
| Done!! |
 |
| New layout. Much better!! |
 |
| Chuck approves !!! |
 |
grinder, drill, engineer's bench vise, air compressor,
acetylene gas cylinders, tool bags, etc... |
 |
| sun-visors and rear mirror made with plasticard... |
 |
| Wooden floor and lateral details done |
 |
| Interior painting... |
 |
| Testing the fit... |
 |
| Tools and tools ... |
 |
| Making air hoses and electric wires... |
 |
| Aziz, lights !!! |
 |
| The workshop almost done... |
 |
| Space for specialized mechanical ... |
 |
| Testing the roof... |
 |
| Panther suspension blueprint in the bench... |
 |
| I made a clipboard notes... |
 |
| Clipboard notes and bench drill |
 |
| Notice the benches... |
 |
| Wood boxes for tools... |
 |
| Grinder and tool metal box... |
 |
| Small anvil in the metal cabinet... |
 |
| Engineer's bench vise |
 |
| Air compressor, air hoses and acetylene gas bottles... |
 |
| Notice the transparencies... |
 |
| The bus closed ( I hate "demountable" kits...) |
 |
| Perfecting the cammo painting: Panzer-gray |
 |
| Green stripes in the PG cammo...after many winters !!! |
My option was to place this vehicle in France, after the Day-D. A survivor of the old days of the early stages of the war. The girl wearing American equipment captured, such as the welding trolley which will be coupled in the rear of the vehicle.
 |
The allied welding trolley captured. My idea; wheels removed and
the apparatus in a speciaql rack in the rear. |
 |
The rack for the welding trolley. Notice in the left
side the pin for the trolley's wheels. |
 |
| Done... |
 |
| Right side view |
 |
| left side view |
 |
| Detailing... |
My girl belongs to the 1st Motorized Repair Shop Company - 12th SS - Panzer Division - "Hitler Jugend." France, 1944, shortly after the invasion of Normandy. Markings based on this excellent guide markings available online at this link:
German Militay Symbols.
 |
| Markings in the workshop bus... |
 |
| Steffi |
 |
1st Motorized Repair Shop Company
12th SS - Panzer Division - "Hitler Jugend." France, 1944, |
Time to do a load in the top rack of the bus ...
 |
| Making the load in the bus top... |
And the girl was done; Opel Blitz Bus 3.6 - 47 - Model W39 Ludewig built (early) - 1st Motorized Repair Shop Company - 12th SS - Panzer Division - "Hitler Jugend." France, 1944.
 |
| Notice the two logs in the roof rack, good for bogs and soft soils. |
 |
| Interior view |
 |
| Interior view |
 |
Opel Blitz Bus 3.6 - 47 - Model W39 Ludewig built (early)
1st Motorized Repair Shop Company
12th SS - Panzer Division - "Hitler Jugend." France, 1944, |
 |
| Opel blitz bus with Kojak and Rover, the dog... |
 |
| DAK and 12th SS Pz.Division |
 |
| The two girls face to face... |
Well, Gents...thanks for following !!!
Wir sehen uns bald !!!


Uau!! Show, Serra!! Esse Opel Bus tem sido meu sonho de consumo nos últimos tempos para dar continuidade a um projeto que vai para lá de alguns anos para terminar... Parabéns!!
ResponderExcluirFelipe Werneck
Marcos, a perfect study of the history of Opel, the perfect sequel to the construction of the model.
ResponderExcluirHi Marco, again a very nice and interesting project. I stay tuned to see the end of this particular workshop Bus. I hope to see it very soon ;-)
ResponderExcluirMoi there, my namesake.
ResponderExcluirGreat to hear / see for a long time
Great work, and many of the details, such as a round chair
and all the other tools and small machines.
Besides, all crowned by a magnificent seamed stockings, and high heels ..
Felipe, Stana, Alain and Maximex: thanks , my friends... Thanks a lot !!!
ResponderExcluirThats got to be one of the best models I have ever seen on the internet. Awesome in every way from the vice to der hund!!!
ResponderExcluirThanks, Doc...thanks for the kind words !!!
ResponderExcluirCheers!!
You never cease to inspire me Marcos. You made me build a bus too, only in civilian colours. Feel free to check my finished opel Blitz bus out on http://nystrupgravel.blogspot.dk/2016/10/bus-ready-for-departure.html
ResponderExcluirLooking forward to follow your next build!
Claus Nielsen, sorry my delay!! Your message fell into limbo here, but I managed to view it now... I had responded to you on your blog, but here I owe you: once again, excellent work!!!
ExcluirBuen trabajo estoy haciendo precisamente ese pero el de radio, puede decirma la medida de las tablillas del suelo, gracias
ResponderExcluirHolla Anonimo... Gracias, hombre... Lo siento, pero estoy de vacaciones y lejos de mi mesa de trabajo (y de mis kits...) Así que no puedo ayudarte precisamente, pero creo que las fotos de los pasos de construcción pueden ayudarte. En cualquier caso, el buen método de experimentación cumple con estos requisitos. Mucha suerte con tu chica y hablemos... Feliz Año Nuevo!!!
Excluir