Tankers and fellow modelers!!
Again, let's see another representative of this fun family of Toon-tanks, from MENG. Today, we will talk about the Matilda Mk II Infantry Tank A12, the so-called "Queen of the Desert". I usually build these chibi-tanks for my beloved wife, Mariko ... She loves their cartoonish look.... Let's meet this little English girl, my old fellow!!
 |
| Meng's A12 Matilda II kit (#WWT-014) box art |
The kit comes in a beautiful and resistant box, very colorful, with examples of decoration. As always in my Toon-buildings, I will try to use parts from "serious" kits, to bring the Toon-kit closer to its original model looks... This is the plan!!
 |
Kojak and the new Toon-tank in his box...
A nice box-art... |
As I said before, I'm going to try to use Matilda's 1/35 pieces to do an up-grade on the Toon-tank. I have a scrap of an old
Matilda Mk. II by Tamiya Brasil (#MT-002), which will serve as a donor of pieces for this project.
 |
| Matilda Mk.II (#MT-002) from Tamiya Brazil box art |
Although I will be using Tamiya Mk.II's vinil tracks, I realized that my Toon-tank's tracks were deformed due to the crushing of pieces in the sprue packaging. Here is a good option to fix any deformity in the tracks of the Toon-tanks ... and these tracks will be saved ... who knows in the future they may serve for another strange project ??? But they will be kept in good condition ...
I immersed them in boiling water for a few seconds and adapted them in these two bottles of primer, until cooling .... Easy and fast
 |
The Toon-tank tracks after a hot bath...
The deformities disappeared as if by miracle ... |
 |
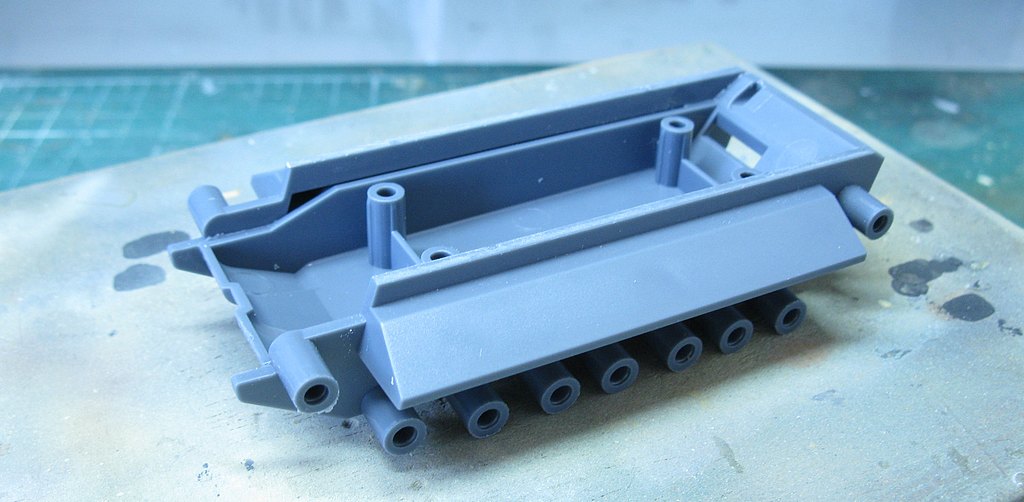
Building the the "bathtub" of the tank chassis.
The pieces are of the snap-kit type, but I stick them
and eliminate the seams of the joints ...
It is a Toon-tank, but it deserves all our "constructive respect" ... |
 |
It may seem aggressive, but a great way to install the pins of the
suspension wheels is to use a light hammer, with firm and delicate strokes,
at the same time ... The adaptation is perfect !!! |
 |
The suspension is ready!!!
My intention was to use the drive-sprocket and idler wheel of it Tamiya,
but they are too big for the toon-hull ... |
Here is another problem, but this one was easy to get around: the "serious" tracks have teeth on their inner face, which fit into the grooves between the wheels and the main wheels. But in the Toon-tank, these wheels are solid...(see red marks below). The options would be to make the grooves in the wheels (but there is not enough material and height for that ...) or remove the teeth from the tracks. I opted for the "dental extraction" option ... After all, tooth removal surgery is my specialty !!!!
 |
The "serious" Tamiya's vinyl tracks with teeth...
Dental surgery under progress... |
 |
The toothless Tamiya track ...
Someone is going to need a denture !!! |
Dry-run of the upper-hull on the chassis to test if there is enough space for the tracks Tamiya: like a glove !!!
 |
| Tamiya's tracks enters a little tight, but it looks very beautiful !!! |
 |
After cutting the tracks, gluing the links "top-to-top" with super-glue,
with reinforcement of the seam with insulating tape + super-glue.
The green arrow points to insulating tape used as protection agains super-glue...
The protective tape will then be removed ... |
 |
Tamiya Tracks in position: the red arrows indicate the top-to-top bonding
and the blue arrows the reinforcements with electrical tape ... |
 |
| The girl testing her new (and much more beautiful ...) shoes |
 |
| A little tight, but a lot prettier !!! |
 |
| Great success!!! |
 |
| Internal view ... Really, much better !!! The splice is invisible ... |
Another improvement ... and one of the characteristics of the Matildas: the use of thermal insulation in the exhaust pipes. This is easy to reproduce with thin copper wires wrapped tightly around the tubes. The holes in the toon-kit parts are for the introduction (and bonding with super-glue...) of the beginning of the wires, allowing their traction ...
 |
The original exhaust pipes and the toon-kit ones...
Lets do the thermal insulation... |
 |
| Much, much better!! And easy to do.... |
 |
| Kojak is a wise and hard-work guy... |
 |
Much, much better!!!
These exhausts are "so Matilda!" |
 |
Correcting another flaw in the Toon-kit: it has the exhaust muffler
but no gas outlet !! How absurd!!! Therefore, we will use one of the
exhaust ends of the donor Matilda .. the position is strange, but it is the only one that fits ...
But until it became "mechanically" logical ... and quite credible ....
(blue arrow above) |
 |
The complete exhaust system, installed in the upper deck of the Toon-Matilda.
Sooo pretty !!
The final exhaust pipe marked with the blue arrow ... |
 |
I glued these strange handles to the hull just to cover the rips on the sides ...
Then I will cut and sand these portions of the upper-hull, just like in the original tank ... |
As my Matilda-scrap was already painted, to use the improvement pieces I must first remove the paint from these pieces. A good tip is to immerse these parts in brake fluid for automobiles (more or less 6 to 8 hours...) . This fluid does not attack the plastic but is a great paint remover (enamel or acrylic). Use a very cheap and simple fluid... The simpler and cheaper the fluid, the more aggressive it is with the paint ...
 |
A "paint remover" bath: hydraulic brake fluid...
Can you recognize some of the pieces that I will use ??? |
 |
The Matilda's-toon front view...
Notice the plugged holes in the front fenders
and front hull |
 |
Side view. Notice the plugged holes
in the side hull and turret |
 |
| Rear view...All holes plugged!! |
Let's start the job of adding "real features" to our little toon-tank. Let's add as many pieces as possible that can better define a Matilda as a tank !!
 |
Adding Tamiya 2 pdr. gun in plastic and
a metal Besa 7.92mm MG |
 |
The images in the Matilda Tamiya construction manual are a
great guide for installing the "recovered" parts ... |
 |
| Notice the "yellow" Tamiya parts... |
 |
| Big eyes!!! |
 |
| Man, this it is soooo cute!!! |
 |
| The turret's square ammunition boxes are so characteristic of the Matildas ... |
 |
| Look at the ejected fuel tank "smashed" ... A little touch of reality ... |
 |
It is very important that we can "identify" the Toon-tank ..
This is a Matilda Mk. II. Dot! |
 |
| Replacing "toons" details by "real" details is really cool !!! |
 |
| The Toon-girl, ready for painting... |
 |
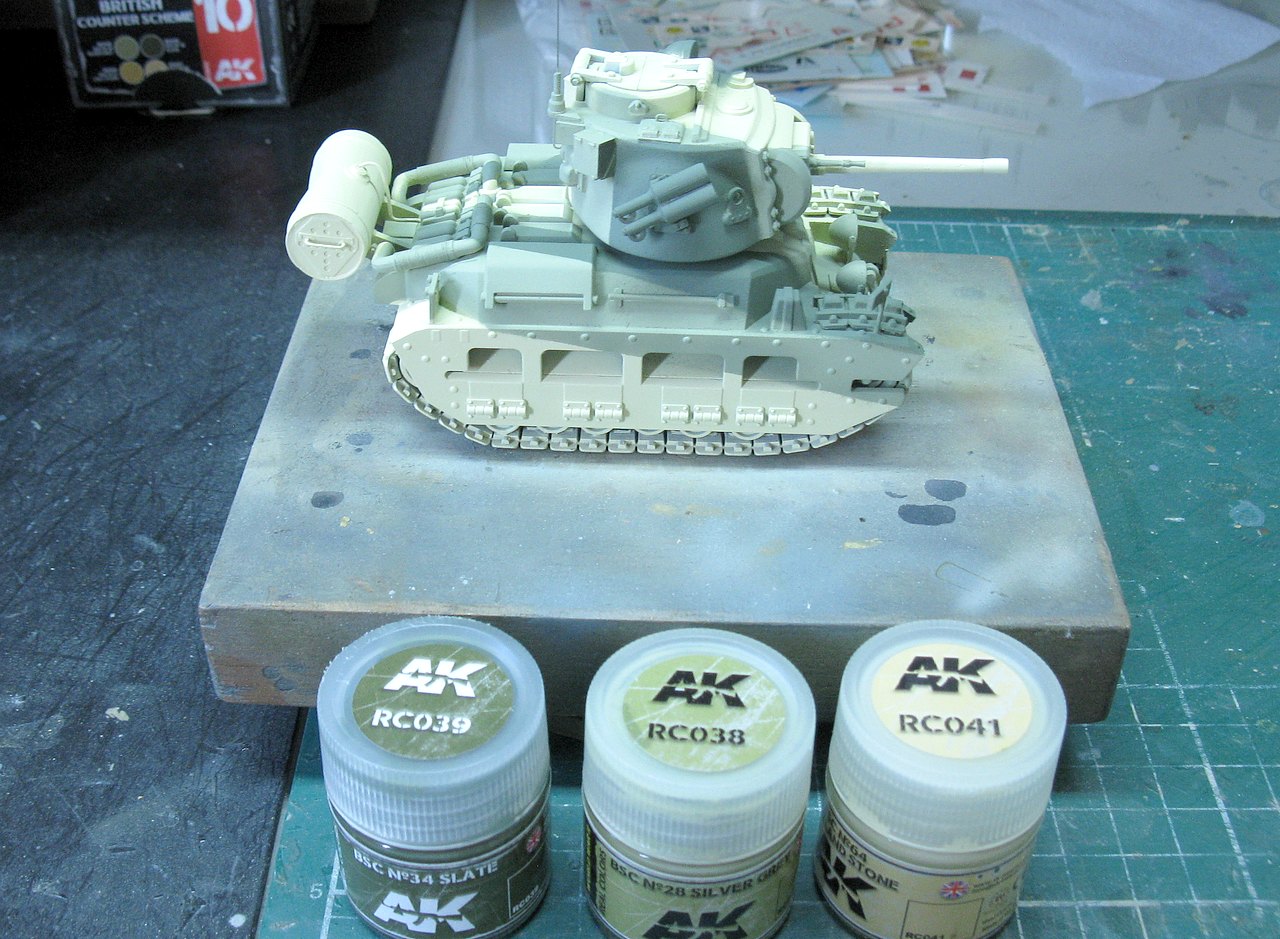
White primer..
Notice in background, the spare-box decals... |
For this project, I decided to make one of the most emblematic camouflages of the British, in WWII ... The Caunter Scheme. Here's the real thing, designed for the Matilda Mk.II Infantry Tanks:
 |
| Caunter Scheme desert cammo... |
And another feature of my constructions: a profile with the colors and markings of the built vehicle. I researched the markings of a tank that was preparing to be embarked for combat in the African desert in 1942. Meet BADGER, a Matilda Mk.II serving at 8th Armoured Division, 23rd Armoured Brigade, in the Junior Armoured Regiment of The King's, the 40th Royal Armoured Regiment. Huzzah!!!
 |
| Matilda Mk.II toon-tank markings profile. |
|
 |
After primer, the application of the lightest color: Portland Stone
AK RC-041 |
 |
After masking with adhesive tape, following the sequence
from the lightest color to the darkest:
RC-038 Silver Gray and RC-039 Slate
The AK Real Colors paint set Caunter Scheme is very good!!!
(I have no sponsorship of any brand. It is a sincere compliment !!) |
 |
| The Caunter Scheme is sooo cute in this little beast!! |
 |
| A cute little girl full of evil intentions ... |
 |
| It looks or doesn't look like a real Matilda ??? |
 |
| left view |
 |
| 3/4 rear left view |
 |
Applying thin layers of Future (Pledge) to avoid
the miserable silvering effect on decals ... |
 |
| And Matilda Mk.II BADGER was born.... |
 |
| Front view... |
 |
| 3/4 front right side |
 |
| right view |
 |
The BADGER's rear view...
Next, matt varnish and weathering... |
Well, this Toon-chibi-tank was ready... I loved the project.... These little beasts are ideal for you to have fun and relax ... Really an excellent time-pass !!! With you: BADGER, a Matilda Mk.II Infantry Tank A12 serving at 8th Armoured Division, 23rd Armoured Brigade, in the Junior Armoured Regiment of The King's, the 40th Royal Armoured Regiment. She's ready to embark for the fight in the Desert, in May, 1942.
 |
BADGER - Matilda Mk.II Infantry Tank A12 - 8th Armoured Division
23rd Armoured Brigade - Junior Armoured Regiment
40th Royal Armoured Regiment( The King's)
United Kingdom - May, 1942. |
 |
| Matilda Mk.II Infantry Tank A12 |
 |
Matilda Mk.II Infantry Tank A12
left view |
 |
Matilda Mk.II Infantry Tank A12
left 3/4 rear view |
 |
Matilda Mk.II Infantry Tank A12
right 3/4 rear view |
 |
Matilda Mk.II Infantry Tank A12
right view
|
 |
Matilda Mk.II Infantry Tank A12
right 3/4 front view
|
 |
| Matilda Mk.II Infantry Tank A12 |
 |
| Kojak inspecting his new Matilda Mk.II Toon-Tank |
 |
| The bald one is very satisfied, as is Rover, the dog. |
 |
BADGER - Matilda Mk.II Infantry Tank A12 - 8th Armoured Division
23rd Armoured Brigade - Junior Armoured Regiment
40th Royal Armoured Regiment( The King's)
United Kingdom - May, 1942. |
That's all FOR NOW, Folks!


Nenhum comentário:
Postar um comentário